Noisy footage can be a significant hurdle in achieving a professional final product. Whether it's the grainy texture that appears in low-light conditions or the distracting hum of background audio, unwanted noise can detract from even the most compelling content. Fortunately, DaVinci Resolve, a user-friendly yet powerful video editing tool, offers robust solutions for both video and audio noise reduction. This comprehensive guide will delve into the intricacies of these tools, providing a structured approach to cleaning up your footage and elevating your post-production workflow.
Understanding the Nature of Noise
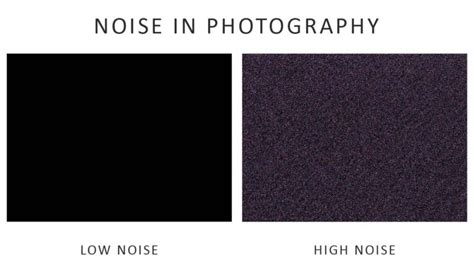
Before embarking on the denoising process, it's crucial to understand what causes noise in video and audio. In video, noise typically results from filming in poor lighting conditions or using a high ISO setting. This manifests as tiny specks or a grainy texture on the image, often more pronounced in darker areas. For audio, unwanted noise can stem from various sources: low-quality microphones, challenging recording environments (like wind or traffic), electrical hums, air conditioning, or even the natural "room tone" of a space. Identifying the source and type of noise is the first step towards effective removal.
DaVinci Resolve's Noise Reduction Toolkit: An Overview
DaVinci Resolve provides a sophisticated suite of tools designed to tackle both video and audio noise. These tools are integrated seamlessly into the software, allowing for precise control and fine-tuning. The core of video noise reduction lies within the Color page, accessible through the Motion Effects panel or the OpenFX library. For audio, the Fairlight page is the central hub, offering dedicated noise reduction effects.
Tackling Video Noise: Temporal vs. Spatial Reduction
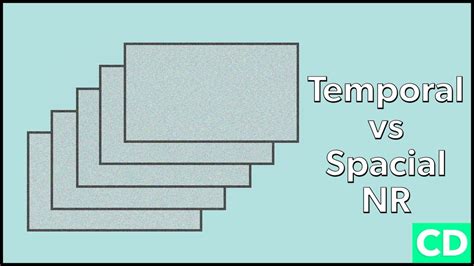
Removing unwanted noise from video can be a significant challenge in video editing. DaVinci Resolve offers two primary methods for video noise reduction: Temporal Noise Reduction (NR) and Spatial Noise Reduction. Understanding the distinction between these two is key to applying them effectively.
Temporal Noise Reduction (Temporal NR)
Temporal noise reduction targets moving images by analyzing and comparing frames before and after the current one. It essentially "looks" at how noise changes over time in a sequence of frames.
- How it Works: Temporal NR analyzes multiple frames of footage at once, comparing them to each other and to a reference frame to identify areas of the image that contain noise. Once the noise is identified, the tool applies an intelligent algorithm to remove it, while preserving as much detail and sharpness as possible. The result is a cleaner, more polished image that looks more professional.
- Key Controls:
- Frames: This setting allows you to choose the number of frames DaVinci Resolve should analyze. You can select a value between 0 and 5 frames. More frames mean longer render times, which won't necessarily improve the final output. Starting with 2 or 3 frames is often a good approach.
- Mo. Est. (Motion Estimation): This setting allows you to select the method DaVinci Resolve uses to detect motion in the image. Options often include "Faster" (less accurate, quicker processing, ideal for shots with minimal motion) and "Better" (most accurate, higher quality results, but requires significant processing, best for complex scenes with higher motion).
- Motion Range: This adjustment tells Resolve how much motion to expect in your footage. Use a smaller range for footage with subtle motion to help reduce artifacts. A high motion range is better for more dynamic scenes, but it can also soften fine details. Options typically include "Small," "Medium," and "Large."
- Temporal Threshold (Luma and Chroma): These parameters are crucial for fine-tuning the noise reduction.
- Luma Threshold: This setting reduces noise in the brightness channel specifically. If you set it too high, your footage can end up with plastic-looking or smoothed-out details.
- Chroma Threshold: The Chroma setting reduces color noise, which typically shows up as splotches of different colors on your footage. Increasing this helps clean color noise without any noticeable changes to the sharpness. Chroma is useful for more damaged media with very obvious noise artifacts.
- Blend: If your noise reduction settings are suitable, but the results seem overdone, try increasing the "Blend" parameters for temporal noise reduction. This helps to reintegrate some of the original image detail.
Spatial Noise Reduction (Spatial NR)
Spatial noise reduction, on the other hand, targets still images by analyzing a single frame. It operates by analyzing the pixels within a defined area of a single frame to smooth out noise.
- How it Works: Spatial NR looks at each individual pixel and attempts to remove noise without affecting the detail or clarity of the image. It analyzes the pixels in a defined radius to work out what's noise and then smooths it out.
- Key Controls:
- Mode: Similar to motion estimation, this setting impacts how Resolve analyzes the frame. Options often include "Faster" (best for low-noise footage, less processing-intensive), "Better" (a good balance of quality and speed for most use cases), and "Enhanced" or "UltraNR" (ideal for challenging, high-ISO footage with a heavy processing cost, or for saving very damaged footage, though these can cause extreme smoothing).
- Radius: This setting defines the area of pixels that will be analyzed for noise, with options like "Small," "Medium," and "Large." A larger radius can effectively smooth out high-frequency noise but might create smooth or blurred edges.
- Spatial Threshold (Luma and Chroma): These function similarly to their temporal counterparts but are applied to individual pixels within a single frame.
Workflow for Video Denoising in DaVinci Resolve
Improving video quality by reducing noise in your footage with the Motion Effects panel in DaVinci Resolve requires a systematic approach. The best workflow for denoising footage in DaVinci Resolve often involves a combination of temporal and spatial noise reduction.
- Select the Correct Node: Before you start applying noise reduction, make sure you select the correct node in the Color page. It's generally recommended to apply noise reduction before you color grade, ideally on the very first node. Tackling noise before adding other color adjustments prevents you from potentially making the noise worse and harder to remove.
- Enable Temporal NR First: The first noise reduction method to try is temporal noise reduction. It's often less processor-intensive than spatial NR.
- Frames: Choose between 1 to 5 frames from the "Frames" dropdown menu.
- Motion Estimation: Set Motion Estimation (Mo. Est. Type) and Motion Range based on the amount of motion in your footage. For more motion, opt for "Better" and "Larger." For less motion, adjust accordingly.
- Luma and Chroma Thresholds: With "Luma" and "Chroma Thresholds" linked, gradually increase one until you see noise reduction in the non-moving parts of the image.
- Handle Chroma Noise: If your footage has more chroma noise than luma noise, unlink the "Luma/Chroma" function after you've adjusted the luma noise to a satisfactory level.
- Adjust Motion Thresholds: Lower it to exclude more moving content from the noise reduction, or raise it to include more. If you're still not satisfied, try improving the "Mo. Est. Type" and "Motion Range" settings.
- Preview Regularly: As you apply noise reduction, it's important to preview your footage frequently to see how it looks. Zoom in to examine details and check for artifacts.
- Consider Spatial Noise Reduction: To further eliminate noise in the remaining areas of the image, activate spatial noise reduction.
- Mode: Select the "Better" option for superior results, but be aware that this might require more processing power.
- Luma and Chroma Thresholds: Adjust these parameters to target remaining noise. Again, unlink "Luma/Chroma" if you need to address them independently.
- Radius: With high luma or chroma threshold settings in spatial noise reduction, you might need to select a larger option from the "Radius" dropdown menu to enable a more thorough scene analysis.
- Blend Noise Reduction: If your noise reduction settings are suitable, but the results seem overdone and the image looks too smooth or artificial, try increasing the "Blend" parameters for both temporal and spatial noise reduction. This can help to reintroduce some natural texture.
- Sharpening (If Necessary): Sometimes, aggressive noise reduction can lead to a softened image. If your image is looking a bit softer, you can add a new node and use sharpening tools to restore detail.
- Render: Once you're happy with the noise reduction settings, it's time to render your footage. To do this, click on the "Deliver" tab and select your output settings.
DaVinci Resolve 20 Audio Tutorial | Easy Steps For Super Clear Audio
Utilizing OpenFX Noise Reduction
DaVinci Resolve also fully supports the OpenFX standard for visual effects plug-ins. This provides an alternative method for applying noise reduction.
- Navigate to the Edit Workspace: OpenFX effects are typically accessed from the "Edit" workspace, located at the bottom of the interface.
- Find the Noise Reduction Effect: Scroll down the list of available effects within the Open FX library until you find "Noise Reduction."
- Apply the Effect: Drag and drop the "Noise Reduction" effect onto the video clip in your timeline that you wish to edit.
- Adjust in the Inspector: Activate the Inspector, located in the top right corner of the DaVinci Resolve operation page, to access and adjust the parameters of the applied OpenFX noise reduction.
While both methods achieve similar results, the integrated Motion Effects panel offers a more streamlined workflow for many users.
Addressing Audio Noise in DaVinci Resolve
Noisy audio can be just as detrimental to a video's quality as visual noise. DaVinci Resolve's Fairlight audio editing suite provides powerful tools to combat unwanted background sounds.
Understanding Fairlight's Noise Reduction Tools
Fairlight offers a dedicated "Noise Reduction" effect within its Audio FX library. This tool is designed to automatically detect and reduce unwanted noise from your audio recordings.
- Key Features:
- Noise Reduction Effect: This is the primary tool for removing background noise. It can be applied to individual clips or entire tracks.
- Presets: The Noise Reduction effect comes with various presets that can serve as a starting point for different types of noise.
- Manual Controls: For more precise control, you can adjust parameters such as:
- Threshold: Determines the level at which noise reduction effects kick in.
- Attack: Controls the speed at which the filter reacts to background noise.
- Sensitivity: Specifies how noise reduction is targeted. Higher values can remove more background noise but risk removing desired audio.
- Ratio: Controls how strong the reduction effects are once the threshold is reached.
- Smoothing: Spreads noise reduction effects over a longer time period.
- Output: Adjusts the overall volume of your tracks after noise reduction.
Workflow for Audio Denoising in Fairlight
- Access the Fairlight Page: Navigate to the "Fairlight" page in DaVinci Resolve.
- Locate the Noise Reduction Effect: In the Mixer panel, under the "Effects" section for your audio track, click the "+" icon. Navigate to "Restoration" and select "Noise Reduction." Alternatively, you can find it in the "Audio FX" dropdown.
- Apply the Effect: Drag and drop the "Noise Reduction" effect onto the desired audio track or clip. The Noise Reduction panel will open.
- Utilize Auto Speech Mode (for Dialogue): If your audio clip contains dialogue, "Auto Speech Mode" can be a quick and easy way to remove unwanted noise. DaVinci Resolve attempts to identify speech and reduce background noise. However, be aware that this mode can sometimes cause frequency distortion or make voices sound muffled.
- Listen to Noise Only: Within Auto Speech Mode, you can select "Listen to Noise Only" to hear exactly what DaVinci Resolve is identifying as background noise. This helps you gauge the aggressiveness of the reduction.
- Employ Manual Mode with Room Tone (Recommended): For more control and often better results, especially if you've recorded room tone, use the manual mode.
- Record Room Tone: If possible, always record at least 10 seconds of "room tone" â the natural ambient sound of your recording environment with no intentional sound.
- Learn the Noise: In manual mode, bring your cursor to where the room tone begins and press the "Learn" button. This instructs DaVinci Resolve to analyze and "learn" the specific noise profile of your environment.
- Apply and Adjust: Once the noise print is learned, DaVinci Resolve will attempt to remove similar noise patterns from your dialogue. Listen to the before and after to fine-tune the settings.
- Preview and Refine: As with video noise reduction, regularly listen to your audio with and without the effect applied to ensure you're achieving a balance between noise removal and preserving the desired audio quality. Avoid overdoing it, as this can lead to unnatural-sounding audio.
- Create Presets: If you frequently encounter similar types of background noise, you can save your custom noise reduction settings as a preset for future use. Click the "+" tab next to the preset dropdown in the Noise Reduction panel, name your preset, and click "OK."
Best Practices and Considerations
- Apply Noise Reduction Early (Video): For video, it's generally best to apply noise reduction as one of the first steps in your color grading process, ideally on the first node. This prevents subsequent adjustments from exacerbating the noise.
- Don't Overdo It: Whether it's video or audio, excessive noise reduction can lead to unnatural-looking or sounding results. The goal is to reduce distracting noise, not to completely eliminate all ambient sound or texture. Strive for a subtle, natural improvement.
- Understand the Trade-offs: Both temporal and spatial noise reduction, and audio noise reduction, can be resource-intensive. Be prepared for longer render times, especially with complex footage. Aggressive settings can also lead to a loss of fine detail or a "plastic" look in video, or a muffled sound in audio.
- Third-Party Plugins: While DaVinci Resolve's built-in tools are powerful, there are also excellent third-party plugins available that can offer specialized AI-driven noise reduction capabilities for both video and audio.
- Prevention is Key: The best noise reduction is often achieved by preventing noise in the first place. When filming, aim for good lighting conditions and use the lowest ISO necessary. When recording audio, use the best microphone possible, record in a quiet environment, and always capture room tone.
By understanding the tools and techniques available within DaVinci Resolve, you can effectively combat unwanted noise in your video and audio footage. This meticulous approach to noise reduction will significantly enhance the overall quality and professionalism of your projects, ensuring your audience can focus on your message without distraction.