The Displace filter in Adobe Photoshop, a tool that has remained remarkably consistent since its introduction in Photoshop 2.0, offers a powerful yet often underutilized method for manipulating pixels within an image. Its primary function is to move pixels based on the information contained within a separate image, known as a displacement map. While the absence of a live preview can make its application a trial-and-error process, understanding how displacement maps work unlocks a world of creative possibilities, from generating intricate textures to crafting highly realistic effects like water reflections.
Understanding Displacement Maps: The Foundation of Pixel Manipulation
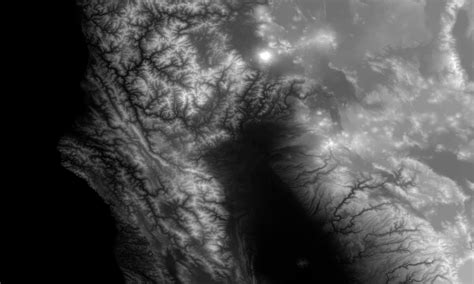
At its core, a displacement map is an image that dictates the extent and direction of pixel movement in a target image. These maps come in two primary forms: simple grayscale maps and compound RGB maps.
Simple Grayscale Displacement Maps:In a grayscale displacement map, the brightness values of the pixels directly control the displacement.
- Pure White: Lightest values (255) instruct Photoshop to move pixels up and to the left by a maximum of 128 pixels.
- Neutral Gray (50%): A mid-tone gray (brightness value of 128) results in no pixel movement, leaving them in their original position.
- Pure Black: Darkest values (0) command Photoshop to move pixels down and to the right by a maximum of 128 pixels.
- Intermediate Brightness Values: Any shade of gray between black and white will displace pixels proportionally to their brightness, falling somewhere between these extremes.
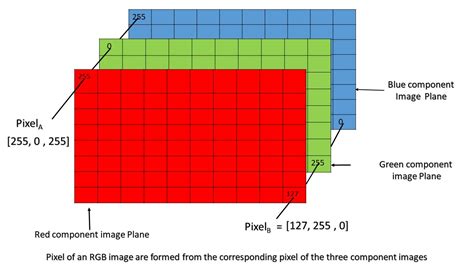
Compound RGB Displacement Maps:Compound maps utilize the red and green channels of an RGB image to control displacement. The blue channel does not contribute to the displacement effect.
- Red Channel: White in the red channel dictates movement to the left, while black dictates movement to the right.
- Green Channel: White in the green channel instructs pixels to move upwards, and black directs them downwards.
- Distance: The overall distance of the displacement is still determined by the brightness values, similar to grayscale maps.
Important Considerations for Displacement Maps:Regardless of whether you use a simple or compound map, it is crucial to save them in Photoshop's native .psd format with "Maximum Compatibility" enabled. This ensures that Photoshop can properly interpret the map's data for the Displace filter.
The Displace Filter Dialog: Controlling the Movement
When you apply the Displace filter (Filter > Distort > Displace), you'll encounter a dialog box with several key parameters:
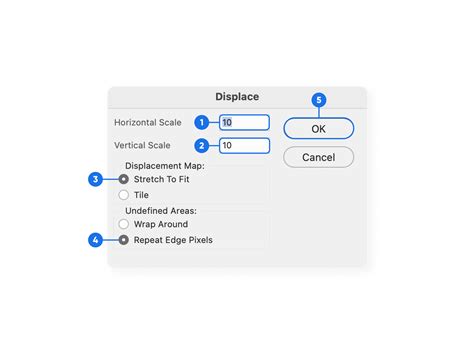
- Horizontal Scale: This value determines the intensity of horizontal displacement. A value of 100% corresponds to the maximum possible shift dictated by the map (e.g., 128 pixels for pure white or black in a grayscale map). The default value is often 10%, meaning the maximum displacement is reduced to 12.8 pixels. You can input values ranging from -999 to 999. Negative values reverse the direction of the displacement.
- Vertical Scale: Similar to the horizontal scale, this controls the intensity of vertical displacement.
- Stretch to Fit: This option is essential when your displacement map is not the same dimensions as your target image. It scales the map to fit the dimensions of the selection or layer you are displacing.
- Repeat Edge Pixels: When the displacement extends beyond the boundaries of the map, this option fills the gaps by repeating the edge pixels of the map. This helps to avoid abrupt transitions.
Since the Displace filter lacks a live preview, achieving the desired effect often involves experimentation with these settings.
Crafting a Realistic Water Reflection: A Step-by-Step Tutorial
One of the most compelling applications of the Displace filter is the creation of realistic water reflections. This process involves generating a displacement map that mimics the subtle undulations of a water surface, then applying it to a reflected image.
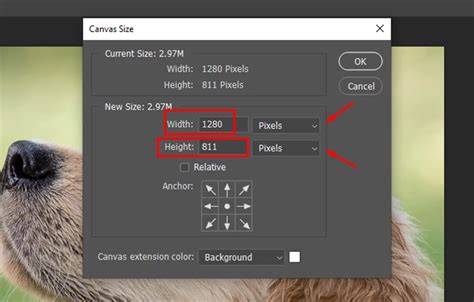
Step 1: Prepare the Base Image and Create Canvas Space
Begin with your original image. Duplicate the background layer (Ctrl+J or Command+J). To accommodate the reflection, you'll need to add canvas space below the image. Go to Image > Canvas Size. Set the Height to 100% and ensure the "Relative" option is checked. Click the center square in the top row of the 3x3 grid to add the extra space to the bottom.
Step 2: Create the Initial Reflection
With the top layer selected, flip it vertically (Edit > Transform > Flip Vertical). Use the Move Tool to drag this flipped image down so its top edge aligns with the bottom of the original image. This forms the basic reflection.

Step 3: Generate the Water Ripple Displacement Map
This is where we create the "map" that will distort the reflection.
- Add a new blank layer above the reflection.
- Fill this new layer with white (set Background color to white, then use Ctrl+Backspace or Command+Delete).
- Go to Filter > Sketch > Halftone Pattern. Set the Pattern Type to "Lines," adjust the Size to around 7 (for more lines), and set Contrast to 50. This creates a series of sharp black and white horizontal lines.
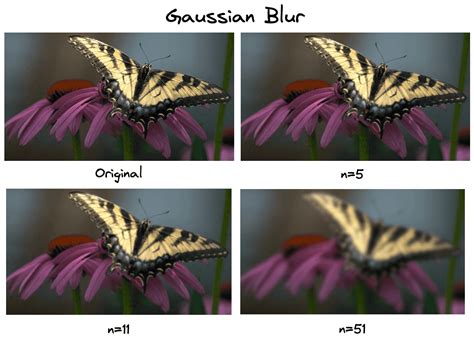
- Next, smooth these lines to create subtle transitions. Go to Filter > Blur > Gaussian Blur. Adjust the Radius until the lines have soft edges. A radius of around 4 pixels is often sufficient.
- Now, duplicate this "lines" layer into a new document (Layer > Duplicate Layer, set Document to "New"). Save this new document as a Photoshop
.psdfile (e.g., "water-ripples.psd") with Maximum Compatibility. Close this temporary document. You can now delete the "lines" layer from your main document.
Step 4: Apply the Displacement Map to the Reflection
- Merge your original image and its reflection. With the top layer selected, use Shift+Ctrl+Alt+E (Win) or Shift+Command+Option+E (Mac) to create a merged layer.
- With this merged layer active, go to Filter > Distort > Displace.
- In the Displace dialog, set the Horizontal Scale to a value that creates a subtle ripple (e.g., 4-10%). Set the Vertical Scale to 0, as horizontal distortion is more characteristic of water ripples. Ensure "Stretch to Fit" and "Repeat Edge Pixels" are checked.
- Click OK, and navigate to your saved "water-ripples.psd" file and open it. The reflection will now be distorted, creating the illusion of ripples.
Step 5: Refine and Colorize the Reflection
- Masking: You'll likely have ripples in the original image area as well. To isolate the effect to the water, select the merged layer and add a Layer Mask (click the Layer Mask icon at the bottom of the Layers palette). Before clicking the icon, Ctrl-click (Win) or Command-click (Mac) the thumbnail of the flipped reflection layer to create a selection of just the reflection area. This will mask the displacement effect to only the reflection.
- Soften the Mask Edge: To avoid a harsh line between the original image and the water, select the layer mask, then apply a subtle Gaussian Blur to it (Filter > Blur > Gaussian Blur).
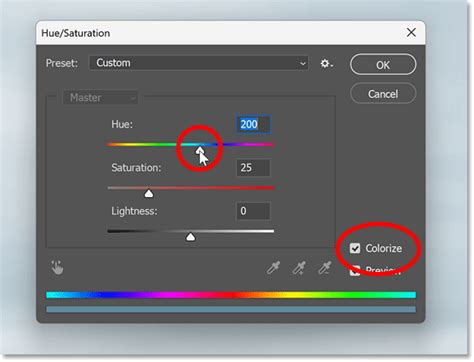
- Colorize the Water: Add a hint of color to the water. Create a new Adjustment Layer (Alt+Click the New Adjustment Layer icon, then select Hue/Saturation). In the Hue/Saturation dialog, check "Colorize" and adjust the Hue slider to your desired water color. Crucially, ensure this adjustment layer is clipped to the layer below it (Layers > Create Clipping Mask or Alt+Click between the layers in the Layers palette). Lower the Opacity of the Hue/Saturation layer to achieve a subtle tint.
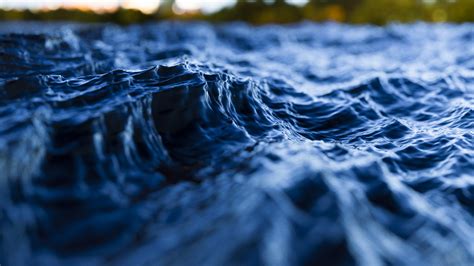
The result is a convincing water reflection effect, achieved through the precise application of a custom displacement map and the Displace filter.
Beyond Water: Other Applications of Displacement Maps
The principles learned in creating a water reflection can be extended to numerous other creative applications.
- Conforming Objects to Textures: You can use a displacement map to make an object, like a flag or a logo, conform to the contours of a textured surface. This involves creating a displacement map that represents the texture's bumps and valleys and then applying it to the object layer.
- Creating Unusual Shapes: Simple or complex displacement maps can be used to distort images in unique and unexpected ways, leading to abstract art or surreal compositions.
- Simulating Underwater Effects: By creating a displacement map that mimics the distortion caused by bubbles and currents, you can add an underwater feel to an image. This often involves generating a bubble pattern, blurring it, and then using it to displace a duplicated water layer.
- Tattoo and Logo Mockups: Displacement maps are invaluable for creating realistic mockups. By using a desaturated version of the skin or fabric as a displacement map, you can apply a tattoo or logo and have it realistically conform to the curves and textures of the surface.
The Displace filter, when paired with thoughtfully created displacement maps, transforms Photoshop from a simple image editor into a powerful tool for illusion and realism. Its ability to precisely move pixels based on external data provides artists and designers with a sophisticated method for adding depth, texture, and dynamic effects to their creations. Experimentation is key, and by mastering the creation and application of displacement maps, you can unlock a vast potential for enhancing your digital artwork.
How to Conform Text to a Surface Using a Displacement Map in Photoshop
tags: #water #displacement #map #photoshop