Photoshop offers a versatile toolkit for graphic designers and artists, enabling the recreation of a wide array of visual styles. Among these, the distinct retro charm of screen-printed graphics and the digital glow of LED displays are particularly sought after for fine arts or commercial projects. This tutorial delves into techniques for achieving these effects, ranging from a textured, analogue screen print look to a modern, pixelated LED display.
Achieving a Screen Printed Graphic Effect
Screen-printed graphics possess a unique retro aesthetic that many find appealing. The process often involves applying ink through a mesh screen, resulting in a characteristic texture and sometimes imperfect registration. Photoshop provides several methods to emulate this look, transforming digital photographs into visually engaging screen-printed artwork.
Preparing the Image for Screen Printing
The journey begins with selecting a suitable photograph. A good starting point is a high-contrast image with clear subjects. For instance, an image of a tiger's face can serve as an excellent candidate for this transformation.
- Initial Selection: Open your chosen photo in Photoshop. Utilize the Lasso Tool (L) to create a rough selection around the primary subject, such as the tiger's face. This initial selection helps isolate the area you wish to stylize.
- New Document Setup: Create a new document (Cmd+N). The dimensions of this new document will automatically adjust based on the copied selection, ensuring it fits appropriately.
- Introducing Texture and Degradation: To mimic the look of old photocopied or printed materials, the image needs some roughening.
- Desaturate: Desaturate the image by pressing (Cmd+Shift+U). This removes all color, converting it to grayscale.
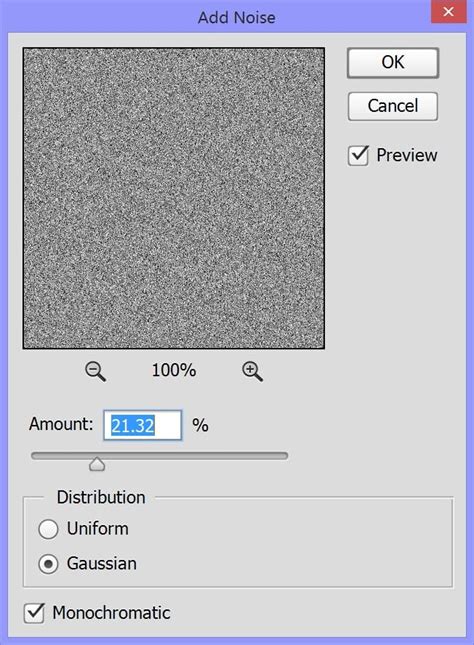
- Add Noise: Apply a noise filter to introduce grain. Navigate to (Filter | Noise | Add Noise). This step is crucial for breaking up smooth tones and simulating the imperfections of print.
- Convert to Grayscale: For the final step in this stage, convert the image to Grayscale (Image | Mode | Grayscale). You may be prompted to flatten the image; confirm this action.
Simulating the Halftone Screen Effect
The hallmark of screen printing, especially in a retro context, is often the halftone pattern. This technique breaks down continuous tones into dots of varying sizes.
- Bitmap Conversion: Convert the image to Bitmap mode (Image | Mode | Bitmap). For output, a resolution of 72dpi was selected, and the Halftone Screen method was chosen. This process converts the grayscale image into a pattern of dots.
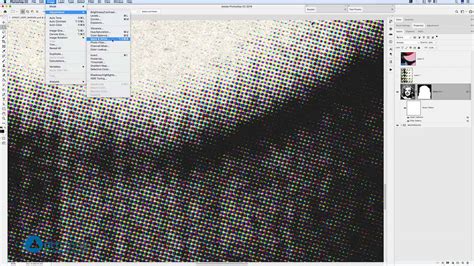
- Mode Switching: After applying the Bitmap mode and Halftone Screen, switch the image back to Grayscale mode and then to RGB. This sequence can sometimes help refine the halftone effect and prepare the image for further manipulation or integration into other artwork.
Integrating into Vector Artwork and Further Refinements
The generated screen print graphic can be a standalone piece or integrated into larger designs.
- Vectorization: For use in vector artwork, the graphic can be taken over to Illustrator and subjected to an Auto Trace. This process converts the pixel-based image into scalable vector paths, offering immense flexibility for design work. The result of an auto-traced vector can be seen below.
- Alternative Screen Print Textures: Beyond the halftone approach, other filters can contribute to a screen-printed feel. The Cutout filter, for instance, is excellent for collages or typography, breaking down images into distinct, flat areas of color. Filters that simulate natural or traditional media effects, such as drawing with colored pencils on a solid background, or creating the appearance of roughly cut pieces of colored paper, can also add to the analogue charm. A dry brush technique, which falls between oil and watercolor, can also be employed to add textured strokes.
The Posterize filter is useful for reducing the number of color tones and midtones in an image, creating a more graphic, poster-like appearance. Filters like Oil Paint can simulate brush strokes and blend colors, while Smudge Stick can create a smeared effect. For a more textured and broken appearance, Accented Edges can outline image edges with a colored stroke, and Chalk and Charcoal can simulate drawing with these materials on a textured background. Graphic Pen draws black lines on the image, and Conté Crayon mimics strokes of pastel chalk on a textured background. Sprayed Strokes create the effect of a spatter airbrush, and Sumi-e simplifies details with water and color, resembling ink wash painting.
Creating an LED Screen Effect in Photoshop
The LED screen effect offers a contemporary, digital aesthetic, characterized by glowing pixels and a distinct color palette. This effect is particularly useful for creating futuristic interfaces, digital art, or adding a technological feel to graphics.
Building the LED Screen Background Pattern
The foundation of the LED effect is a custom pattern that mimics the underlying structure of an LED display.
- New Document for Pattern: Create a new document with specific dimensions: 30 x 30 Pixels, at 300 Dpi, using "RGB Color Mode".
- Grid Setup: Zoom in (Command/Control +) as much as possible. Set up guides every 10 Pixels to create a grid. This can be done by dragging guides from the rulers or by going to
View > New Guideand inputting the "Horizontal" and "Vertical" values. This grid will help in precise placement of pattern elements. - Creating Colored Squares:
- Select the "Rectangle Tool" (U). Draw a square that fits the first quadrant of your grid. Change its "Fill" color to
#8484fe(a shade of blue). - Duplicate this square by holding the "Option/Alt" key while dragging the shape down to the next quadrant. Double-click on the thumbnail of the duplicated square and change its "Fill" color to
#6a6a6a. Repeat this process one more time, using#5353edas the "Fill" color for the next quadrant.
- Select the "Rectangle Tool" (U). Draw a square that fits the first quadrant of your grid. Change its "Fill" color to
- Color Variations:
- Select the three blue squares, duplicate them, and place them in the middle quadrants. Change the "Fill" color of these squares to shades of "Red":
#fc8888,#e86e6e, and#e14949from top to bottom. - Repeat the same process to fill the right quadrants, this time using "Green":
#84fe84,#6cea6c, and#55dc55from top to bottom.
- Select the three blue squares, duplicate them, and place them in the middle quadrants. Change the "Fill" color of these squares to shades of "Red":
- Defining the Pattern: Once all squares are placed and colored, right-click on their thumbnails and select "Flatten Image". Select all elements (Command/Control + A), then go to
Edit > Define Pattern. Name this pattern "RGB Texture" and click "OK".
Applying the LED Screen Effect to an Image
With the background pattern defined, the next step is to apply it and other effects to an image.
- Background Layer: Create a new document, this time with dimensions of 1920 x 1024 pixels. Click the "Create a New Fill or Adjustment Layer" button at the bottom of the "Layers" Panel and choose "Solid Color". Use a dark grey color, such as
#171515. If desired, delete the original "Background" layer. - Pattern Overlay for Background: Double-click on the "Color Fill" Layer thumbnail to open Layer Styles. Apply a "Pattern Overlay" with the defined "RGB Texture" pattern.
- Importing and Blending the Image: Open the image you want to use. Copy it (Command/Control + C) and paste it (Command/Control + V) into your file. Change its "Blending Mode" to "Exclusion". This mode creates a unique interaction between the image and the background, often resulting in vibrant and unexpected color shifts.
- Smart Object Conversion and Pattern Overlay: Right-click on the layer thumbnail of the pasted image and choose "Convert to Smart Object". This allows for non-destructive editing. Double-click on the Smart Object layer and apply another "Pattern Overlay". Use the "RGB Texture" pattern again, but this time adjust the settings as needed for the desired effect.
Adding Blurring and Pixelation
To enhance the LED display look, subtle blurring and pixelation are applied.
- Gaussian Blur: Go to
Filter > Blur > Gaussian Blurand set a "Radius" of 2.0 Pixels. This softens the image slightly. - Motion Blur: Apply a
Filter > Blur > Motion Blur. Use a 0° Angle and a "Distance" of 5 Pixels. This can add a subtle sense of movement or scanlines. - Mosaic Filter: Finally, go to
Filter > Pixelate > Mosaicand set a "Cell Size" of 2 squares. This breaks the image into distinct blocks, strongly mimicking the pixelated nature of LED screens.
Enhancing Glow and Color
The final touches involve adding a glow and adjusting color balance.
- Inner Glow: Double-click on your layer thumbnail to open Layer Styles. Apply an "Inner Glow" Layer Style. Adjust the settings for color, blend mode, and opacity to create a subtle light emanating from within the pixels. Then, lower the "Opacity" of the Inner Glow to 80%.
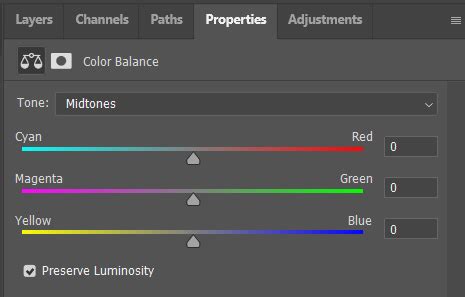
- Color Balance Adjustment: Go to the "Adjustments" Panel and create a "Color Balance Adjustment Layer". For "Midtones" and "Shadows", set the "Magenta-Green" value to +10. For "Highlights", set it to +30. This helps to push the colors towards a more artificial, vibrant look often associated with LED screens.
Final Transformations and Editing Flexibility
The accumulated effects can be further refined through transformation and Smart Object editing.
- Consolidating Layers: Select all your layers by holding the "Shift" key while clicking on their thumbnails. Right-click on them and choose "Convert to Smart Object". This groups all applied effects into a single, editable Smart Object.
- Distorting and Scaling: Zoom out (Command/Control -) to create space around your document. Open the "Transform Tool" (Command/Control + T).
- Distort: Hold the Command/Control key and select one of the corners, then pull it. Repeat this with all corners. This allows for non-uniform scaling and perspective changes.
- Scale: Release the Command/Control key and drag the corners to scale the image uniformly.
- Once satisfied with the transformation, press "Enter".
- Modifying the Artwork: The beauty of using Smart Objects is the ability to easily modify the original content. To do this, double-click on the "Smart Object" thumbnail. A new document will open, allowing you to replace the original image with text or another image and experiment with different settings. This flexibility ensures that the LED screen effect can be adapted to various creative needs, from fine arts projects to commercial applications.
Texturelabs // Analog Retro-Futuristic Monitor in Photoshop!
Understanding Photoshop's Filter Capabilities
Photoshop's extensive filter library offers a vast array of tools for image manipulation, including those that can simulate various artistic and photographic effects. Understanding their functions can unlock creative possibilities.
Blur Filters: Softening and Sharpening Edges
Blur filters are fundamental for softening images, reducing noise, and creating depth of field effects.
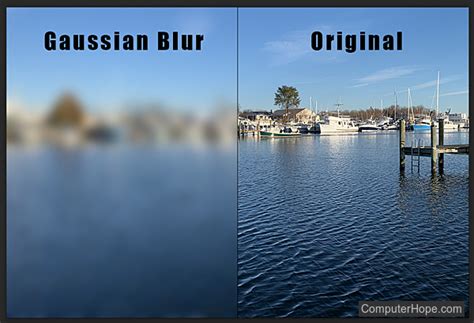
- Gaussian Blur: This filter applies a Gaussian function to generate blur, creating a smooth, bell-shaped curve of pixel weighting. It's often used for subtle softening or creating soft focus effects. When applied to a selected area, it can sometimes produce unexpected results at edges due to sampling data from outside the selection.
- Box Blur: A simpler blur filter that averages the pixels within a specified radius. It can produce a blockier blur compared to Gaussian blur.
- Motion Blur: Simulates the blur caused by movement, allowing control over angle and distance. This can add dynamism or a sense of speed.
- Shape Blur: Allows for blurring based on a specific shape, offering more artistic control over the blur's character.
- Radial Blur: Creates blur that radiates from or contracts towards the center of the image, useful for spinning or zooming effects.
- Smart Blur: A more advanced blur filter that attempts to preserve edges while blurring, offering control over radius, threshold, and noise reduction. It's excellent for reducing noise while retaining detail.
- Surface Blur: Blurs pixels while preserving edges by looking for dissimilar pixels. It's effective for smoothing skin or reducing noise without losing important details.
Pixelate Filters: Creating Blocky Effects
Pixelate filters break an image down into larger, visible blocks, useful for stylized effects or emulating digital displays.
- Mosaic: Divides the image into rectangular cells of uniform color, creating a mosaic-like appearance. This is key for the LED screen effect.
- Crystallize: Creates a mosaic effect with irregular polygons.
- Pointillize: Fills the selection with large, circular dots, simulating a pointillist painting.
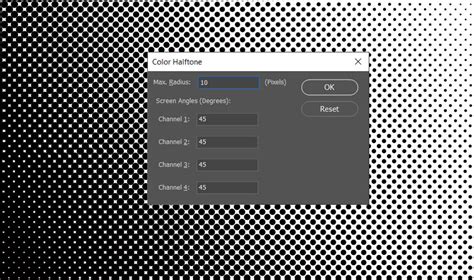
- Color Halftone: Simulates the effect of a halftone screen used in printing, breaking images into dots based on color channels. This is crucial for the screen print effect.
- Facet: Groups similar colored pixels into blocks of like-colored pixels, creating a faceted look.
Stylize Filters: Artistic Transformations
Stylize filters are designed to create painterly, artistic, or abstract effects.
- Accented Edges: Outlines edges with a colored stroke, simulating pen-and-ink drawings.
- Chalk and Charcoal: Mimics the effect of drawing with chalk and charcoal on textured paper.
- Chrome: Gives an image a polished, metallic chrome-like surface.
- Conté Crayon: Simulates strokes of conté crayon on a textured background.
- Cutout: Simplifies the image into distinct areas of flat color, ideal for collages and graphic designs.
- Dry Brush: Creates a textured effect between oil and watercolor painting.
- Film Grain: Adds noise to simulate the grain of photographic film.
- Find Edges: Detects and highlights edges in an image, often used as a starting point for other effects.
- Glowing Edges: Adds a neon-like glow to the edges of an image.
- Graphic Pen: Draws black lines on the image, as if sketched with a graphic pen.
- Ink Outlines: Traces the edges of color with the original fill color, creating an inked look.
- Mosaic: (Also listed under Pixelate)
- Oil Paint: Applies a painterly effect, simulating brush strokes and color blending.
- Paint Daubs: Simulates the effect of applying paint with daubs of thick brush strokes.
- Posterize: Reduces the number of color levels in an image, creating poster-like areas of flat color.
- Rough Pastels: Simulates the effect of coarse chalk pastels.
- Smudge Stick: Creates a smudged, blended effect.
- Solarize: Inverts the lighter areas of an image, similar to overexposure in film photography.
- Sprayed Strokes: Mimics the effect of a spatter airbrush.
- Sumi-e: Simplifies details with water and color, resembling traditional Japanese ink wash painting.
- Texturizer: Applies a texture to an image, such as canvas, sandstone, or brick.
- Torn Edges: Creates the illusion of torn paper edges.
- Twirl: Twists a selection around a central point.
- Wave: Distorts an image by creating undulating waves.
- ZigZag: Creates a zigzag distortion effect.
Distort Filters: Reshaping and Warping
Distort filters manipulate the pixels of an image in various ways, creating warping, swirling, or displacement effects.
- Bake: Creates 3D or other reshaping effects by using a displacement map.
- Displace: Distorts a selection using a displacement map, allowing for complex warping.
- Glass: Simulates the effect of looking through textured glass, often used with custom glass filters.
- Ocean Ripple: Creates a wavy, water-like distortion.
- Pinch: Squeezes a selection inwards or outwards.
- Polar Coordinates: Converts between Cartesian and polar coordinates, useful for creating cylindrical or spherical distortions.
- Reconstruct: Rebuilds distorted areas of an image.
- Ripple: Creates a wavy distortion, controllable in magnitude and direction.
- Shear: Slants the image along a curve.
- Spherize: Makes a selection bulge or contract as if viewed through a sphere.
- Twirl: (Also listed under Stylize)
- Wave: (Also listed under Stylize)
- ZigZag: (Also listed under Stylize)
Other Notable Filters
Beyond these categories, Photoshop includes numerous other filters for specific purposes:
- Clouds/Difference Clouds: Generates cloud-like patterns using foreground and background colors.
- Lens Flare: Simulates the effect of light reflecting within a camera lens.
- Render Filters (e.g., Fibers, Lighting Effects): These filters create realistic or stylized lighting and texture effects. The Fibers filter, for example, can create woven patterns.
- Sharpen Filters (e.g., Unsharp Mask, Smart Sharpen): Used to enhance edge detail and clarity. Smart Sharpen is particularly advanced, offering noise reduction and control over sharpening in highlights and shadows.
- Noise Filters (e.g., Add Noise, Despeckle, Reduce Noise): Used to add or remove graininess and speckling from an image.
- Other Useful Filters: Extrude creates 3D-like shapes, Liquify offers powerful mesh-based warping, and Vanishing Point allows for perspective-correcting edits on planes.
The legacy 3D features were removed from Photoshop as of July 2024, but the remaining filters, combined with techniques like Smart Objects and layer styles, provide an immense creative palette for achieving diverse visual outcomes.
Advanced Techniques for Image Integration
Photoshop's "Paste Into" command is a powerful tool for seamlessly integrating images into specific areas of another. This is particularly useful for placing images onto screens within a photograph, such as a TV or computer monitor.
Step-by-Step Integration with "Paste Into"
- Prepare the Target Image: Open the image containing the display device (e.g., a TV).
- Select the Screen Area: Use a selection tool like the Polygonal Lasso Tool to precisely select the screen area. Click in each corner of the screen to create a closed path.
- Open the Image to Insert: Open the second image (the one that will appear on the screen) in a separate document.
- Select and Copy the Image: Select the entire image (Ctrl+A or Cmd+A) and copy it (Ctrl+C or Cmd+C).
- Paste Into the Selection: Switch back to the document with the TV screen. Go to
Edit > Paste Into. Photoshop will paste the copied image and automatically create a layer mask based on your selection, ensuring the image appears only within the screen boundaries. - Adjusting the Inserted Image:
- Temporarily Turn Off Layer Mask: To reposition the image, you might need to see it fully. Hold Shift and click the layer mask thumbnail to temporarily disable it.
- Reposition and Resize: Use Free Transform (Ctrl+T or Cmd+T). Lower the layer's opacity to see the TV screen behind it. Move and resize the image as needed. Hold Shift while dragging corner handles to maintain proportions.
- Adding Depth (Image "Jumping Out"): To create the illusion that an object is emerging from the screen, select the parts of the inserted image that should appear outside the screen boundaries. Re-enable the layer mask (hold Shift and click the mask thumbnail). With the layer mask selected, use the Brush Tool with white color to paint over the selected areas that should be visible outside the screen. This effectively adds those parts to the visible area of the mask.
- Finalize Selection: Deselect (Ctrl+D or Cmd+D).
This method, using "Paste Into" and layer masks, provides precise control for integrating images and creating compelling visual effects, such as objects appearing to break free from a digital display.