Selecting hair in Photoshop, especially when it's tousled or windblown, can often present a significant challenge for even experienced photo editors. The intricate strands, varying opacities, and the tendency to blend with backgrounds can make achieving a clean and precise selection a time-consuming and frustrating process. However, with the right tools and techniques, this task doesn't have to be difficult. This tutorial will guide you through the process, leveraging Photoshop's powerful selection capabilities to achieve professional-looking results. We'll explore various tools and workspace features designed to tackle the complexities of hair masking, ensuring a seamless integration of subjects into new backgrounds or the refinement of existing images.
Initial Selection: Laying the Foundation
The journey to a perfect hair selection begins with an initial, broad selection of the subject. For this, Photoshop offers several intuitive tools. The Lasso tool is a classic choice, allowing for freehand selections. When using the Lasso tool for hair, it's crucial to leave the edges of the hair slightly outside the initial selection area. This strategy prevents the inclusion of background elements that can complicate the refinement process later on. Similarly, the Quick Selection tool is another effective option, intelligently identifying and selecting areas based on color and texture. The key at this stage is to create a reasonable starting point without aiming for absolute perfection. The goal is to capture the main mass of the subject, including the hair, while consciously avoiding any background pixels that might be erroneously included.
To practice these techniques, you can utilize sample files provided by Adobe Stock. These files contain Adobe Stock images that are perfect for honing your skills. If you wish to use these sample files beyond the scope of this tutorial, you have the option to purchase a license directly from Adobe Stock. Alternatively, feel free to use your own images to follow along.
The Select and Mask Workspace: Precision Refinement
Once an initial selection is made, the true power of Photoshop's hair selection capabilities comes into play within the Select and Mask workspace. This dedicated environment offers a suite of tools and views designed specifically for refining complex selections, particularly those involving fine details like hair.
Navigating View Modes for Clarity
The Select and Mask workspace provides multiple View Modes, each offering a different perspective to help you visualize and perfect the edges of your selection. We found the Onion Skin mode to be particularly helpful. By adjusting the Transparency setting within Onion Skin mode, you can better visualize the areas that need to be added to or subtracted from your selection. This mode overlays a semi-transparent view of your selection onto the original image, allowing you to clearly see where the selection accurately captures the subject and where it falls short.
The Refine Edge Brush Tool: Taming Strands
The Refine Edge Brush tool is arguably the most critical instrument for tackling hair. This brush allows you to paint over the edges of your subject, and Photoshop intelligently analyzes the pixels to differentiate between hair and background. The Refine Edge Brush does an excellent job on the first pass, effectively capturing many of the finer strands.
To ensure that everything you intend to select is indeed included, it's beneficial to switch to the Overlay view mode. In this mode, a colored overlay (typically red) appears over the parts of the image that are not included in your selection. This visual cue is invaluable for identifying missed areas. For instance, in a typical scenario, you might notice that part of the model’s hair or even accessories like headphones were not picked up by the Refine Edge Brush in the initial pass.
Integrating Missed Areas with Quick Selection
When the Overlay view reveals missed areas, don't be discouraged. The solution is often a combination of tools. In such cases, we can switch back to the Quick Selection tool and simply brush over those areas that were not included. The Quick Selection tool, with its intelligent edge-detection capabilities, will then add these missed pixels to your existing selection, further refining the mask. This iterative process of using the Refine Edge Brush and then supplementing with the Quick Selection tool allows for a highly accurate and detailed hair selection.
Outputting to a Layer Mask: Non-Destructive Editing
The culmination of the selection process within the Select and Mask workspace is how you output your refined selection. For non-destructive editing, which is paramount in professional workflows, it's best to choose "Output to > Layer Mask" at the bottom of the Properties panel.
Upon selecting this option, Photoshop automatically creates a new layer in the Layers panel (accessible via Window > Layers). This new layer will feature a black-and-white mask thumbnail. The white areas of this mask represent the visible parts of the layer - precisely the selection you've meticulously made in the Select and Mask workspace. Conversely, the black areas of the mask are hidden, effectively isolating your subject. This layer mask is dynamic, meaning you can further refine it by painting with black or white brushes directly on the mask thumbnail without altering the original pixel data of the layer.
Integrating New Elements: Adding a Background or Subject
Once your subject is cleanly masked, you can begin integrating it into new compositions. For example, you might want to place your subject against a different background. To do this, you can drag a new image, such as a speaker image, directly from your computer into your Photoshop document.

Once the new image is placed, you can use the Free Transform tool (Ctrl+T or Cmd+T) to drag the handles and resize the image to fit your composition. Pressing Enter or Return will commit these transformations.
For those seeking a vast library of high-quality imagery, Adobe Stock offers access to over 100 million royalty-free assets, including photos, graphics, and videos. These resources can significantly expedite your creative projects. As mentioned earlier, the sample files provided are excellent for practice, and licenses can be purchased from Adobe Stock for extended use.
Quick Actions for Background Removal
When working with a new image that you intend to use as a background or as a subject itself, Photoshop's "Quick Actions" feature in the Properties panel can be a time-saver. If you have an image with a relatively clear separation between the subject and background, clicking "Remove Background" under Quick Actions can often create a decent initial mask. This can then be further refined within the Select and Mask workspace.
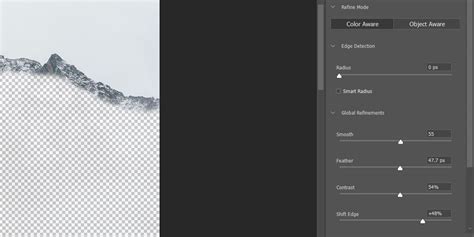
Further Refining Edges with Sliders
Even after using tools like Refine Edge Brush and Quick Selection, the edges of your layer mask might still require subtle adjustments. Within the Select and Mask workspace, you'll find various sliders that allow for fine-tuning. Options like Feather, Smooth, Contrast, and Shift Edge can be used to soften harsh transitions, reduce jaggedness, or subtly expand or contract the mask. Experimenting with these sliders, particularly after setting the View Mode to "On Black" (which provides a stark contrast to evaluate the mask's edges), can yield significant improvements.
5 Pro Photoshop Masking Tricks You Don't Know (Probably)
Advanced Techniques: Painting in Strands and Smart Selections
While Photoshop's automated tools are powerful, sometimes the most realistic results come from a combination of automated selection and manual refinement. Don't worry if your mask isn't absolutely perfect after using the automated tools; this is often the case with intricate hair.
The Power of Manual Painting for Hair Strands
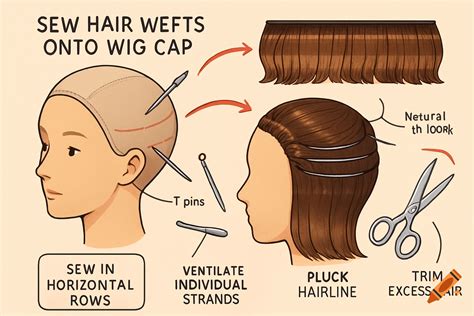
In certain situations, you might achieve even better results by using hair from another image to create and paint in individual strands. This technique involves finding a photograph with a solid background that offers high contrast with the hair you want to replicate.
With the Brush tool active, you can temporarily switch to the Eyedropper tool by holding down the Alt key (Windows) or Option key (macOS). This allows you to sample colors directly from your reference image. You can then use these sampled colors to paint in new strands of hair onto your mask. This manual approach is particularly effective for adding flyaways, wisps of hair, or reinforcing areas where the automated selection struggled.
A crucial tip when painting in hair strands is to avoid using just a single color. Real hair has variations in tone and highlights. By sampling multiple colors from your reference image - including highlights and shadow tones - and applying them with varying brush opacity and flow, you can create a much more natural and believable effect.
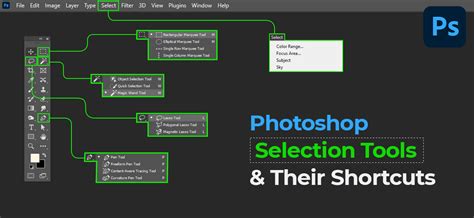
Leveraging "Select Subject" for Initial Separation
Fortunately, Photoshop's photo editing software offers some smart selection tools that make complex masking tasks significantly easier, provided you understand how to utilize them effectively. The "Select Subject" command is a prime example. By simply navigating to the Selection tools and choosing "Select Subject," Photoshop analyzes your image and attempts to automatically identify and select the main subject. This can often provide a very strong starting point, especially for subjects that are well-defined against their background.
Once you have a preliminary separation using "Select Subject," you might find that refining the edges is more precise with a darker background. Therefore, the next logical step could be to temporarily change your document's background to a solid dark color. This increased contrast between the subject's hair and the background makes it easier for Photoshop's edge-detection algorithms to work effectively.
The time has come to refine the edges. After establishing a good initial selection and potentially adjusting the background for contrast, you can re-enter the Select and Mask workspace to meticulously refine the hair edges. Within this workspace, you can employ the Refine Edge Brush and other tools as described earlier to ensure every strand is captured accurately.
To further soften the edges of your figure and create a more integrated look, you should apply a "Fade" effect. This can be achieved through various methods, including using the Feather slider in the Select and Mask workspace or by applying a subtle Feather selection after exiting the workspace. The goal is to prevent a harsh, cut-out appearance and to blend the subject more organically with its new surroundings.
Figure and background are separated. Got it! The process of selecting and masking hair in Photoshop, while initially daunting, becomes manageable with a systematic approach and the effective use of Photoshop's advanced tools. From the initial broad selection to the meticulous refinement of individual strands, each step plays a vital role in achieving a professional-quality result.
If you found these tips helpful and are eager to deepen your understanding of photo editing and retouching, consider exploring comprehensive tutorials. For instance, you can learn how to edit and retouch photos in Photoshop from scratch with expert guidance, such as from instructors like Oriol Segon. Mastering these techniques will empower you to tackle even the most challenging masking scenarios with confidence and precision.