Navigating within an image is a fundamental skill for any Photoshop user, whether you're a seasoned professional or just beginning your digital editing journey. The ability to zoom in and out, and to pan or scroll an image to examine different areas, is crucial for both precision work and understanding the overall composition. This guide delves into the most effective ways to zoom and navigate images in Photoshop, covering essential tools, commands, and keyboard shortcuts that will transform your workflow from basic to pro. While this tutorial is demonstrated using Photoshop 2022, the principles and shortcuts apply to any recent version of the software.
When you first open an image in Photoshop, the software typically zooms it out to fit entirely within your screen. You can observe the current zoom level displayed in the document tab at the top of the workspace, often shown as a percentage such as 33.3%. This zoom level is also duplicated in the lower left corner of the document window.
The Core of Zooming: Keyboard Shortcuts and the Zoom Tool
Mastering keyboard shortcuts is paramount for efficiency in Photoshop. Two of the most universally useful shortcuts relate to zooming:
- Zoom In: Press and hold the
Ctrlkey on a Windows PC, or theCommandkey on a Mac, and then press the plus sign (+). - Zoom Out: Press and hold the
Ctrlkey (orCommandon a Mac) and then press the minus sign (-).
Continuously pressing these key combinations will incrementally adjust the zoom level. As you zoom, you'll notice the zoom level in the document tab change, progressing through preset values such as 50%, 66.7%, and 100%. These are not arbitrary percentages; they represent zoom levels offering the most accurate visual representation of your image.

Understanding Zoom Levels and Pixel Accuracy
It's vital to understand that when viewing an image at a zoom level less than 100%, you are not seeing all of the original pixels. Photoshop is essentially interpolating the data to display a view that fits your screen. Conversely, viewing at 100% is the only way to see a truly accurate representation of your image, where each pixel in the image corresponds to a single pixel on your screen.
For example, comparing an image zoomed to an odd value like 51.25% with one zoomed to the preset 50% reveals a noticeable difference in sharpness, particularly on fine details like eyelashes. The 50% view will appear sharper because it aligns with the image's native pixel structure.
Predefined Zoom Levels and Their Significance
Photoshop offers several predefined zoom levels that are particularly useful for maintaining image clarity: 25%, 33.3%, 50%, 66.7%, and 100%. These levels are designed to provide the most accurate visual feedback, especially when making detailed edits.
To return your image to a view that encompasses the entire image on your screen, you can use the Fit on Screen command, accessible via the View menu. However, for the most accurate assessment of detail, you need to view the image at 100%. This can be achieved by navigating to View > 100%.
A key observation when exploring the View menu reveals that all the main zoom commands share a common modifier key: Ctrl on Windows and Command on Mac. This consistency makes it easier to remember and employ these shortcuts.
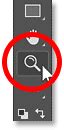
The Zoom Tool: Precision and Control
While keyboard shortcuts are excellent for general zooming, the Zoom Tool, represented by a magnifying glass icon and typically found near the bottom of the Photoshop toolbar, offers more granular control over which part of the image you zoom into.
- Zooming In: With the Zoom Tool selected, simply click on the area of the image you wish to magnify. Each click will zoom in further, typically to the next preset zoom level.
- Zooming Out: To zoom out using the Zoom Tool, press and hold the
Altkey on your keyboard (or theOptionkey on a Mac) and then click on the image.
Photoshop allows you to zoom in significantly beyond 100%, with modern versions supporting zoom levels up to 12800%. However, it's important to remember that zooming beyond 100% does not reveal more detail; it simply enlarges the existing pixels.
The Pixel Grid: Visualizing Individual Pixels
As you zoom in very closely, beyond 100%, you may eventually see an outline around individual pixels. This is known as the Pixel Grid. This grid is purely a visual aid for reference and will not appear in your saved or printed images. You can toggle the visibility of the Pixel Grid by going to View > Show > Pixel Grid. Deselecting it will hide the grid, and reselecting it will bring it back.
Temporary Zoom Tool Access
A highly efficient technique for using the Zoom Tool without disrupting your current workflow is to temporarily activate it.
- Temporary Zoom In: Hold down the
Spacebarand theCtrlkey on Windows (orCommandon Mac). As long as these keys are held down, you can click on an area to zoom in. - Temporary Zoom Out: To zoom out temporarily, add the
Altkey (orOptionon Mac) to the combination: holdSpacebar+Ctrl+Alt(orCommand+Optionon Mac) and click.
Releasing the keys will instantly revert you to your previously active tool.
Advanced Zoom Tool Features: Continuous Zoom and Scrubby Zoom
The Zoom Tool offers further advanced functionalities:
- Continuous Zoom: With the Zoom Tool active, click on an area and hold down the mouse button. After a brief pause, Photoshop will begin zooming in continuously until you release the mouse button.
- Scrubby Zoom: This is often considered the fastest and most intuitive way to zoom. It should be enabled by default. Once the Zoom Tool is selected, simply click on an area and immediately drag to the right to zoom in, or drag to the left to zoom out. The key to Scrubby Zoom is to start dragging immediately after clicking. If you hesitate, Photoshop might interpret your action as the beginning of Continuous Zoom, at which point dragging will have no further effect on the zoom level. If you prefer the Continuous Zoom behavior, you can disable Scrubby Zoom in the tool's options.
How To Enable Scrubby Zoom in Photoshop (Fast Edit Tutorial) – Quick & Easy Guide
Navigating Your Image: Panning and Scrolling
Once you've zoomed in on your image, you'll inevitably need to move around to examine different areas. This process is called panning or scrolling.
The Hand Tool for Panning
The Hand Tool, located in the toolbar directly above the Zoom Tool, is your primary instrument for panning.
- Basic Panning: Select the Hand Tool, then click and hold on your image. Drag the mouse to move the image around the canvas.
- Flick Panning: A dynamic feature allows you to "throw" the image. After clicking and holding with the Hand Tool, drag the image and then quickly release the mouse button. The image will continue to move in that direction, gradually coming to a stop. If this feature doesn't work, ensure it's enabled in Photoshop's Preferences (
Edit>Preferenceson Windows,Photoshop>Preferenceson Mac).
Temporary Hand Tool Access
Similar to the Zoom Tool, the Hand Tool can be accessed temporarily:
- Temporary Hand Tool: Simply press and hold the
Spacebar. While held down, you can click and drag to pan. Releasing theSpacebarwill switch you back to your previously selected tool.
Mouse Wheel Navigation
If your mouse is equipped with a scroll wheel, it offers another convenient way to navigate:
- Scrolling: Moving the scroll wheel up or down will pan the image vertically. Holding
Shiftwhile scrolling can sometimes alter the behavior, often limiting it to preset zoom levels if the scroll wheel is configured for zooming. - Zooming with Scroll Wheel: To enable zooming with the scroll wheel, navigate to
Edit>Preferences>Generaland check the "Zoom with scroll wheel" option. By default, scrolling with the wheel while the Zoom Tool is active will zoom in or out. To zoom in and out with the scroll wheel while any tool is active, you can often hold down theAltkey (Windows) orOptionkey (Mac) and then use the scroll wheel.
Bird's Eye View
For a quick overview of your entire image when zoomed in, the Bird's Eye View is invaluable.
- Select the Hand Tool by pressing
Hon your keyboard. - While the Hand Tool is active, press and hold the
Hkey again. - Click and hold on your image. Photoshop will temporarily zoom out to show your entire image, along with a rectangle indicating the current viewable area.
- Drag this rectangle to reposition your view, and then release the mouse button to zoom back into that new area.
Double-Clicking Tools for Specific Functions
Certain tools have shortcuts associated with double-clicking their icon in the toolbar:
- Fit on Screen: Double-click the Hand Tool icon to instantly zoom out and fit the entire image onto your screen.
- 100% Zoom: Double-click the Zoom Tool icon to jump directly to the 100% zoom level, providing an accurate pixel-for-pixel view.
Advanced Zoom Techniques and Window Management
Photoshop offers several features to enhance the zooming experience, particularly when working with multiple images.
Resize Window to Fit
This option, found in the Zoom Tool's options bar, automatically resizes the image window to perfectly fit the canvas after you zoom. When this is enabled, you won't see any empty space between the image and the window edge. If disabled, the window remains its original size, and grey areas may appear around the image as it shrinks.
Zoom All Windows
When you have multiple images open, the "Zoom All Windows" feature allows you to synchronize the zoom level across all of them simultaneously. This ensures a consistent viewing experience as you work on a project with several related images. To activate this, ensure all desired images are open, then go to the Window menu, under Arrange, and select Match Zoom.
Zoom Tool Shortcuts Revisited
To reiterate some key shortcuts for accessing the Zoom Tool and its functions:
- Select Zoom Tool: Press
Z. - Temporary Zoom In:
Ctrl + Spacebar(Win) /Command + Spacebar(Mac). - Temporary Zoom Out:
Ctrl + Alt + Spacebar(Win) /Command + Option + Spacebar(Mac). - Zoom to Specific Area (with Zoom Tool): Drag the Zoom Tool over the desired area rather than just clicking.
By internalizing these shortcuts and understanding the nuances of each zoom and navigation method, you can significantly improve your speed and precision in Photoshop, transforming complex image editing tasks into a more fluid and enjoyable process. Learning to navigate your images efficiently is as critical as mastering the editing tools themselves, allowing you to focus on the creative aspects of your work with confidence.