A business card is more than just a piece of paper; it's a powerful networking tool, a tangible representation of your brand, and often, the first impression you make on a potential client or collaborator. In today's digital age, the importance of a well-designed, professional business card remains undiminished. This article will guide you through the process of creating a custom business card template using Adobe Photoshop, a versatile industry-standard software that empowers you to bring your creative vision to life. Whether you're a seasoned designer or a beginner looking to enhance your professional presence, this tutorial will equip you with the knowledge and steps to design a business card that truly stands out.
Setting Up Your Canvas: Precision for Print
The foundation of any successful design project, especially one destined for print, lies in meticulous setup. For business cards, standard dimensions and print-ready settings are paramount to ensure a professional and polished final product.
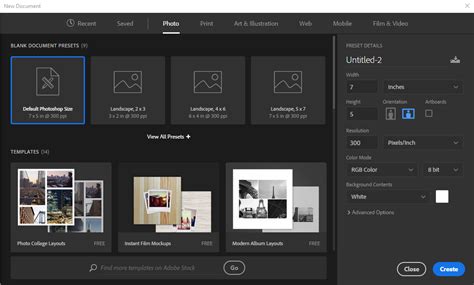
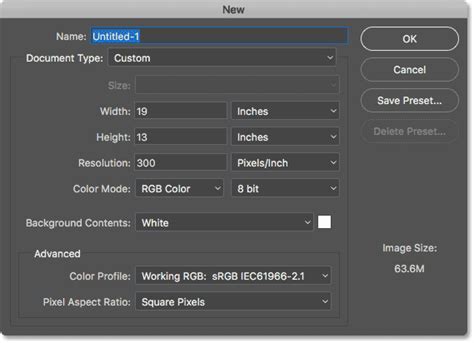
To begin, open Adobe Photoshop. Navigate to File > New. A dialog box will appear, prompting you to set the dimensions for your new document. For a standard business card, the ideal size is 3.5 inches in width and 2 inches in height. It is crucial to set your Resolution to 300 pixels per inch (dpi). This high resolution is essential for ensuring sharp, clear graphics and text when printed, preventing any pixelation or blurriness. Furthermore, for printing purposes, it is vital to set the Color Mode to CMYK (8 bit). CMYK is the color model used by most professional printing presses, ensuring that the colors you see on your screen translate accurately to the printed output. While some digital presses may use RGB, CMYK is the safer and more universally accepted choice for print-ready designs.
Beyond the basic dimensions, professional printing often requires additional space for trimming, known as "bleed." This bleed area ensures that colors and design elements extend beyond the final cut line, preventing any unwanted white edges after the card is trimmed. A common bleed size is 0.125 inches on each edge. Therefore, for a print-ready document, you will initially set your canvas size to 3.75 inches in width and 2.25 inches in height. This 0.25-inch difference accounts for the 1/8th-inch bleed on all four sides.
Once your document is created, it's time to establish guides. These non-printing lines will help you maintain consistent spacing and ensure that crucial elements are placed within safe zones. To display the rulers, press Control-R or go to View > Rulers. You can then click and drag from the rulers onto your canvas to create guides. Establish guides for the "Safe Area," which is typically 0.125 inches inward from the trim line. This ensures that all important text, logos, and graphics remain well within the boundaries of the final card, even with slight variations in the cutting process. You'll also want to create "Trim Guidelines" that mark the actual cut lines (3.5 x 2 inches) and potentially "Boundary Guidelines" to help with precise object alignment. For added convenience, you can lock these guides in place by going to View > Snap To > Guides and then selecting View > Lock Guides.
Designing the Front: Laying the Visual Foundation
With your canvas precisely set up, you're ready to start bringing your business card design to life. This involves establishing a color scheme, incorporating essential text elements, and adding graphic components.
Begin by considering your brand's identity and the message you want to convey. The background color plays a significant role in setting the tone. You can select a color from the toolbar's foreground color swatch. The Paint Bucket Tool (G) is an efficient way to fill your entire canvas with your chosen background color. Alternatively, you can explore the Gradient Tool to create smooth color transitions, adding depth and visual interest to your background. Experiment with different color combinations to find what best represents your brand.

Next, it's time to incorporate your contact information. The Horizontal Type Tool (T) is your primary tool for this. Click on an empty area of the canvas where you want to place text. A text box will appear, allowing you to input your name, job title, company name, phone number, email address, website, and any other relevant contact details. When typing, pay close attention to font selection and sizing. For names, a larger, more prominent font size is generally recommended to make it the focal point. Your job title and company name can be slightly smaller, with the company name often appearing below your name. Other contact information should be legible but can be smaller still. The standard text size for business cards often falls around 10px, but this can vary depending on the font chosen. Consistency in font style and size for similar types of information (e.g., all contact numbers) is key to a clean and organized design.
The Character and Paragraph panels in Photoshop are invaluable for refining your typography. You can adjust font family, font style (bold, italic, condensed), font size, kerning (space between specific letter pairs), leading (space between lines of text), and alignment. For instance, you might want to assign a heavier font style to your name or a different color to a specific word to emphasize it. Using the Paragraph panel, you can control text alignment, such as centering text or aligning it to the right. Remember to press Enter after each piece of information to create new lines for clarity.
6 Golden Rules For Business Card Design (QUICK FIRE TIPS)
Adding graphics and logos is crucial for brand recognition. If you have a company logo, you can import it by going to File > Place Embedded. A vector logo is preferred for scalability without loss of quality, but a high-resolution PNG or JPG can also work. Position your logo carefully, ensuring it is within the safe margins. You can use the Move Tool (V) to reposition elements and the Transform tool (accessed by pressing Control-T or Command-T) to resize them proportionally by holding down the Shift key while dragging the corner handles.
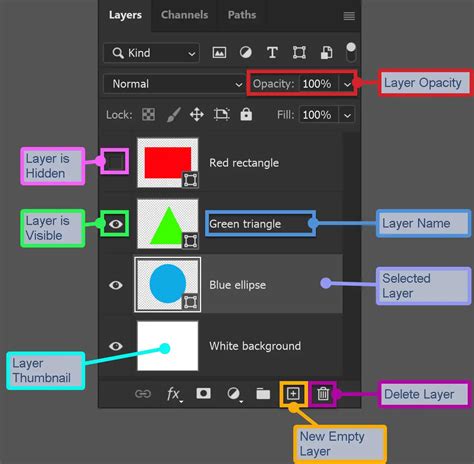
Beyond your logo, you can introduce other graphic elements. The Rectangle Tool (U), Ellipse Tool, and Rounded Rectangle Tool are excellent for creating shapes that can serve as backgrounds for icons, separators, or decorative elements. You can fill these shapes with solid colors or gradients. The Custom Shape Tool allows you to access a library of pre-defined shapes, which can be useful for creating icons for phone, email, or location. Remember to create a new layer for each element you add, including shapes and icons, to maintain organization in your Layers panel. This makes it easier to edit and rearrange elements later.
For added visual appeal, consider applying Layer Styles. A Drop Shadow effect can give shapes and text a subtle depth, making them pop off the background. You can adjust the blend mode, color, distance, spread, and size of the shadow to achieve the desired effect. Experiment with other layer styles like Stroke, Bevel and Emboss, or Color Overlay to enhance your design elements.
Designing the Back: Expanding Your Brand's Narrative
While the front of your business card is crucial for immediate impact and essential contact details, the back offers a valuable opportunity to further reinforce your brand identity or provide additional information.
The process for designing the back of your business card is similar to the front. You'll start by creating a new document or, more efficiently, duplicating your front design. To duplicate, select all the relevant layers of your front design in the Layers panel and go to Layer > Duplicate Layers. You can then remove elements you don't need for the back.
The back of the card can be used for various purposes. You might choose to feature a larger version of your logo, a tagline, a brief company description, a list of services, a QR code linking to your website, or even a subtle pattern that complements the front design. If you're incorporating a QR code, ensure it's large enough to be easily scanned and placed within the safe margins.
You can reuse shapes and text elements from the front, or introduce new ones. For example, if your front has a solid color background, you might opt for a textured background on the back using the Brush Tool with various texture brushes. Alternatively, you could place a full-bleed image or graphic that aligns with your brand aesthetic.
When adding text to the back, maintain consistency with the fonts and colors used on the front, unless a deliberate stylistic departure is intended for a specific purpose. The goal is to create a cohesive and memorable brand experience across both sides of the card.
Finalizing for Print: Saving and Exporting
Once you are satisfied with your business card design, the final step is to prepare it for printing. This involves saving your work in appropriate formats and ensuring all specifications are met.
First and foremost, it is crucial to save your design in Photoshop's native format, .PSD. Go to File > Save As and select "Photoshop (*.PSD)" from the file type dropdown. Saving as a PSD preserves all your layers, masks, and editable text, allowing you to make future modifications easily. It's also a good practice to save frequently throughout the design process to avoid losing any progress.
For printing, you will typically need to export your design in a format that printing services can readily use. The most common formats for print are PDF and TIFF (.TIF).
To save as a PDF, go to File > Save As and choose "Photoshop PDF (*.PDF, *.PDP)". When the "Save Adobe PDF" dialog box appears, it's advisable to select a preset like "Press Quality" or consult with your print shop for their specific recommendations. Ensure that "Include vector data" is checked if you've used vector shapes, and consider embedding fonts.
To save as a TIFF, go to File > Save As and select "TIFF (*.TIF)". The TIFF format is a high-quality, lossless image format that is well-suited for printing. In the TIFF options dialog, ensure that "Save as Copy" is checked, and select "LZW" compression if available, as it's lossless. Crucially, make sure the color mode remains CMYK.
When sending your files to a print shop, always confirm their preferred file format and any specific requirements they may have regarding bleeds, trim marks, or color profiles. Printing a test copy of your business card before a large run is also a wise precaution to check colors and layout accuracy.
By following these steps, you can confidently create a professional and impactful business card using Photoshop, a vital asset for your professional networking endeavors.