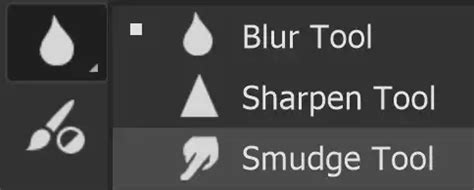
The Smudge Tool in Adobe Photoshop is a versatile instrument that allows users to push, blend, and manipulate pixels, creating effects akin to dragging a finger through wet paint. This capability makes it invaluable for a range of tasks, from intricate digital painting and subtle photo retouching to achieving specific artistic styles. While sharing its toolbar space with the Sharpen and Blur tools, the Smudge Tool stands out for its unique blending capabilities, offering a distinct approach to image manipulation.
Understanding the Core Functionality of the Smudge Tool
At its heart, the Smudge Tool operates by picking up color from the starting point of a brush stroke and dragging it across the image. This process effectively smears and blends existing pixels, rather than introducing new color. The analogy of "dragging a finger through wet paint" is particularly apt, as it captures the fluid and organic way the tool moves and mixes image elements. This characteristic positions the Smudge Tool as a close relative to Photoshop's Mixer Brush, though with its own distinct set of behaviors and applications.
The effectiveness of the Smudge Tool lies in its ability to create smooth transitions between colors and tones, soften hard edges, and generate painterly textures. It can be used to simulate various traditional art mediums, adding a hand-crafted feel to digital creations. Furthermore, its application extends to photographic editing, where it can be employed for subtle enhancements or to achieve specific stylistic outcomes.
Navigating the Smudge Tool's Settings and Options
To harness the full potential of the Smudge Tool, understanding its various settings is crucial. These settings are typically accessed through the Options Bar at the top of the Photoshop interface, and within the Brush Settings panel.
Brush Size and Hardness
Like most brush-based tools in Photoshop, the Smudge Tool's brush can be adjusted in size and hardness. A larger brush will affect a broader area, suitable for extensive blending, while a smaller brush allows for more precise, detailed work. The hardness of the brush influences the transition zone of the smudge effect; a harder brush creates a more defined edge to the smudge, while a softer brush results in a more gradual blend.
Strength
The "Strength" setting, often found in the Options Bar, controls the intensity of the smudging effect. A higher strength means more pigment will be picked up and dragged with each stroke, leading to a more pronounced blend. Conversely, a lower strength offers a more delicate touch, ideal for subtle refinements or when working with sensitive areas of an image. It is often recommended to start with a moderate strength, such as 50%, and adjust as needed.
Finger Painting Mode
A unique option available for the Smudge Tool is "Finger Painting." When this is enabled, the tool will use the foreground color at the beginning of each stroke. This can be useful for introducing a specific hue into the blend, but it fundamentally alters the tool's behavior from a pure blending tool to one that also applies color. For most smudging tasks focused on blending existing colors, it's generally advisable to keep this option unchecked.
Pressure Sensitivity
For users equipped with a pressure-sensitive pen and tablet, enabling the "Use Pressure" option (or similar phrasing depending on the Photoshop version) allows brush size to be dynamically controlled by the pen's pressure. This offers a more intuitive and expressive way to work, mimicking the natural variations in pressure applied when using traditional art tools.
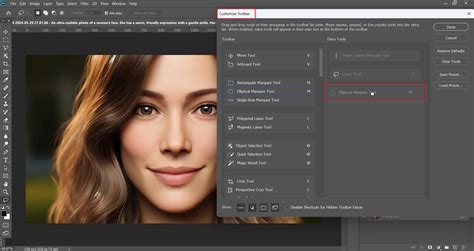
Tool Presets and Resetting Tools
Photoshop allows users to save custom settings for any tool as a "Tool Preset." This is incredibly useful for the Smudge Tool, enabling you to quickly switch between different configurations optimized for various tasks. For instance, you might save a preset for broad blending and another for detailed retouching. If you ever need to revert a tool to its default settings, you can do so by right-clicking on the Tool Presets button in the Options Bar and selecting "Reset Tool."
Advanced Techniques and Custom Brush Creation
Beyond the basic application, the Smudge Tool can be enhanced through the creation of custom brushes and thoughtful workflow practices.
Working on Separate Layers
A fundamental best practice when using the Smudge Tool, especially for significant edits or digital painting, is to work on a separate layer. This can be a new empty layer or a duplicate of the original image layer. When working on a separate layer, it is imperative to ensure that "Sample All Layers" is enabled in the Options Bar. This setting tells the Smudge Tool to sample pixels from all visible layers below the current one, allowing you to blend them onto your active layer without directly altering the original image data.
Working on a separate layer offers several advantages:
- Non-Destructive Editing: You can easily undo, modify, or delete the smudged effects without permanent damage to the original image.
- Experimentation: It provides a safe space to experiment with different blending techniques and strengths.
- Flexibility: You can adjust the opacity of the smudged layer to control the overall intensity of the effect.
However, it's worth noting that working on separate layers with "Sample All Layers" enabled can sometimes introduce a slight lag between your brush stroke and the visual feedback. If this lag becomes disruptive, especially during painting, duplicating the layer and working directly on the duplicate can sometimes offer a smoother experience.
Blend in photoshop with the smudge tool custom blending brush tutorial
Creating Custom Brushes for the Smudge Tool
The default brushes in Photoshop are functional, but for more unique or specialized smudging effects, creating custom brushes is highly recommended. This process involves modifying brush settings and then saving them as a new preset.
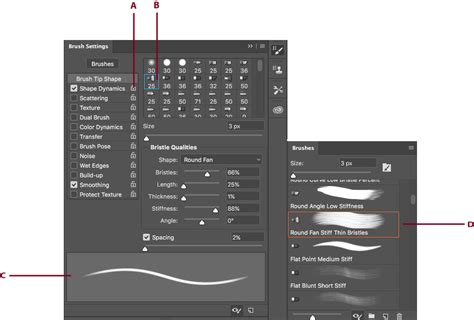
A common scenario is to create a brush that offers a more textured or "dry" smudging effect. This can be achieved by adjusting brush parameters like "Spacing" and "Scattering" within the Brush Settings panel.
- Access Brush Settings: Open the Brushes panel (Window > Brushes) and select a base brush.
- Adjust Spacing: Within the Brush Settings, navigate to the "Brush Tip Shape" section. Increase the "Spacing" value. This separates the individual brush dabs, creating gaps that can lead to a more broken or textured smudge.
- Add Scattering: Go to the "Scattering" tab. Increase the "Count" value to add more scattered instances of the brush tip. This further contributes to a less uniform, more organic texture.
- Consider Angle Jitter: For non-round brushes, adjusting "Angle Jitter" can help break up repetition and create more varied strokes.
- Save as New Brush Preset: Once you are satisfied with the settings, click the "Create new brush" icon at the bottom of the Brushes panel or go to the panel's menu and select "New Brush Preset." Give your custom brush a descriptive name. Importantly, ensure that the settings you've adjusted (like size, spacing, and scattering) are included in the preset by checking the relevant options during the saving process.
This custom brush can then be quickly selected from the Brush Presets picker in the Options Bar, allowing for specialized smudging effects on demand.
Applications of the Smudge Tool
The Smudge Tool's versatility allows it to be employed in a wide array of creative and corrective scenarios.
Digital Painting
In digital painting, the Smudge Tool is a powerful ally for achieving painterly effects. It can be used to:
- Blend Colors: Seamlessly transition between different colors on the canvas, creating soft gradients and atmospheric effects.
- Create Textures: With custom brushes and appropriate settings, it can simulate the look of oil paint, pastels, or charcoal.
- Soften Edges: Smooth out harsh lines or transitions, making elements appear more integrated and natural.
- Add Detail: Create subtle highlights, shadows, or texture variations within painted areas.
The ability to soften edges is particularly valuable. Even if a painting was initially created with hard-edged brushes, the Smudge Tool can be used to unify the elements and give the artwork a more cohesive, hand-rendered appearance.
Photo Retouching
While the Sharpen and Blur tools are often the go-to for photographic adjustments, the Smudge Tool has its place in subtle retouching:
- Softening Imperfections: Small blemishes, skin pores, or unwanted textures can be gently blended away by smudging surrounding tones over them.
- Subtle Reshaping: In very delicate applications, it can be used to slightly alter the form of objects or features, though care must be taken not to overdo it and compromise detail.
- Creating Realistic Effects: It can be used to simulate natural phenomena like windblown hair or the gentle flow of water.
It is crucial to exercise caution when using the Smudge Tool for photo retouching. Its primary function is blending, which can easily lead to a loss of detail if applied too aggressively. Therefore, it is best suited for subtle adjustments where preserving crispness is not the absolute priority.
Creating Painterly Strokes
The Smudge Tool can transform existing image content into painterly strokes. By applying the tool with specific brushes and settings, one can take a photograph or a flat design and give it the appearance of having been painted with broad, expressive strokes. This is achieved by dragging the underlying colors and textures in a manner reminiscent of traditional brushwork.
Distinguishing the Smudge Tool from Related Tools
It's important to differentiate the Smudge Tool from its toolbar companions, the Blur and Sharpen tools, as well as from the Mixer Brush.
Smudge vs. Blur vs. Sharpen
- Blur Tool: Softens an image by reducing detail and contrast. The effect is generally more subtle than the Smudge Tool and aims to create a general softening rather than a directional blend. It's often used for background defocusing or to reduce noise.
- Sharpen Tool: Increases contrast along edges, making details appear crisper. However, it can also introduce artifacts and color distortions if overused. It's primarily for enhancing clarity.
- Smudge Tool: Blends pixels by pushing them around, mimicking a physical smearing action. Itâs about mixing existing color and tone.
Smudge vs. Mixer Brush
The Mixer Brush Tool offers a more sophisticated and controllable approach to blending colors, simulating traditional wet-on-wet painting techniques with more fidelity. It allows for setting the amount of paint, wetness, and even sample color from the canvas. The Smudge Tool, in contrast, is simpler: it picks up and moves existing pixels without adding new color (unless Finger Painting is enabled) and has fewer parameters for controlling the "wetness" or "paint load." While the Mixer Brush offers greater depth for complex digital painting, the Smudge Tool remains a go-to for quick, direct blending and textural effects.
Best Practices and Avoiding Common Pitfalls
To achieve optimal results with the Smudge Tool and avoid common mistakes, consider the following:
- Work Non-Destructively: Always use separate layers for smudging.
- Start with Low Strength: Begin with a lower strength setting (e.g., 20-50%) and gradually increase it as needed. This prevents over-smudging and loss of detail.
- Use Appropriate Brush Size: Match the brush size to the area you are working on. Small brushes for detail, larger brushes for broad blending.
- Be Mindful of Detail Loss: Understand that smudging inherently blends and can obscure fine details. Avoid using it on areas where crispness and high detail are paramount.
- Experiment with Brush Tips: Different brush tips will yield vastly different smudging results. Textured brushes can create more organic and painterly effects.
- Consider the "Lag": If you experience performance issues, try duplicating your layer.
- Save Custom Presets: Create and save presets for different tasks to streamline your workflow.
- Know When to Use Other Tools: Recognize that the Smudge Tool is not always the best solution. The Blur Tool is better for subtle softening, and the Clone Stamp Tool is superior for replicating specific areas of an image.
By adhering to these principles and understanding the nuances of the Smudge Tool, users can effectively integrate it into their Photoshop workflow for both artistic expression and practical image enhancement. Its ability to mimic natural blending processes makes it an enduringly useful tool for a wide range of creative endeavors.