Creating a realistic stamp effect in Adobe Photoshop is a widely sought-after skill for designers aiming to imbue their work with a sense of authenticity, vintage charm, or a distressed, tactile quality. Whether you aim to replicate the look of a rubber stamp, a letterpress print, or a weathered postal mark, Photoshop offers a versatile toolkit to achieve these results. This tutorial delves into various methods, from simple techniques to more advanced composite approaches, ensuring you can produce a custom stamp effect that perfectly suits your project.
Foundations of the Stamp Effect: Text and Basic Shapes
The journey to creating a compelling stamp effect often begins with the fundamental elements: your text and the basic shapes that form the stamp's outline. Photoshop's text tools and vector shape capabilities provide a flexible starting point.
Typography as the Core Element
When crafting a stamp effect, the choice of typeface is paramount. Fonts that mimic hand-drawn lettering, serifs with a classic feel, or even bold sans-serifs can all contribute to the desired aesthetic. To begin, open Adobe Photoshop and create a new document at your desired dimensions. The flexibility of this technique allows for any canvas size.
Select the Horizontal Type Tool (T). You can then type your desired text using any font you wish. Crucially, this text layer remains fully editable throughout the process. This means you can easily change the font, size, and position at any point, offering unparalleled creative control.
Crafting the Stamp Outline
To give your text the appearance of being part of a stamp, an outline is essential. For a classic rubber stamp look, a circular border is a common choice.
Create a new document, perhaps around 850 x 550 pixels, to serve as your workspace for building the stamp elements. To create a perfect circle, select the Ellipse Tool. While holding down the Shift key, drag your mouse to draw a perfect circle. This shape can then be scaled and adjusted as needed. For instance, you might create multiple concentric circles, scaling them to form a layered border. For the Circle 2 layer, hit Command/Control-T to scale the shape. Similarly, for the Circle 3 layer and the Circle 4 layer, use Command/Control-T to scale the shape.
Alternatively, for a more streamlined approach to creating various circular elements, you can download pre-made Circle Photoshop Shapes. Load the CSH file into Photoshop. Then, navigate to Edit > Preset Manager and select Preset Type > Custom Shapes. Set your Foreground color to #000000 (black). Pick the Custom Shape Tool, ensuring the "Defined Proportions" option is checked. This allows you to draw precise shapes from your loaded set.
Integrating Text with the Outline
Once you have your text and your circular outline, the next step is to integrate them seamlessly. A common method involves using the text tool with a vector mask.
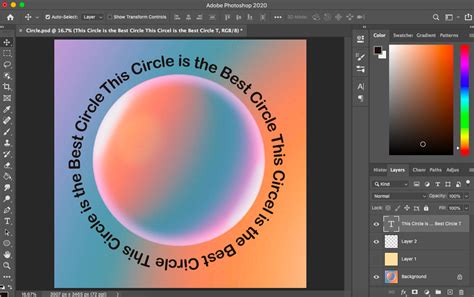
Click on the Vector Mask Thumbnail of your desired circle layer (e.g., Circle 3). Then, select the Horizontal Type Tool. Move your cursor directly over the circle's path. As you hover, the cursor will change, indicating that the text will now follow the path of the circle. Type your text. For example, using the Intro font with the color #000000 for the text can create a strong, legible stamp inscription.
Adding Depth and Texture: The Grunge and Distress Factor
A truly convincing stamp effect relies heavily on texture and the imperfections that come with the stamping process. This is where grunge elements and subtle distressing come into play.
Incorporating Paper and Ink Textures
To achieve a realistic print or ink-on-paper look, textures are indispensable. You can use pre-made paper textures or ink splatters.
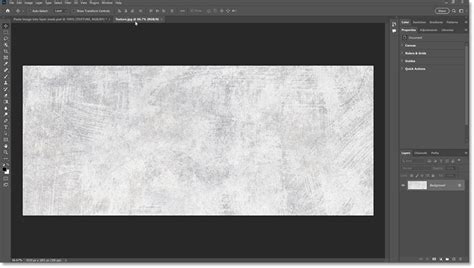
Open Photoshop and create a new file at any size you wish. Go to File > Place. Locate any of the paper textures from a pack like the Recycled Paper Textures and click the Place button. This will import the texture as a new layer.
For a grunge stamp effect, distressed ink textures are ideal. You can find resources like "InkPaint 134LoveRolled black ink" in various sizes (small, medium, large, x large). Placing these textures over your design elements can instantly add a worn, inked appearance.
Applying Layer Styles for Inner Effects
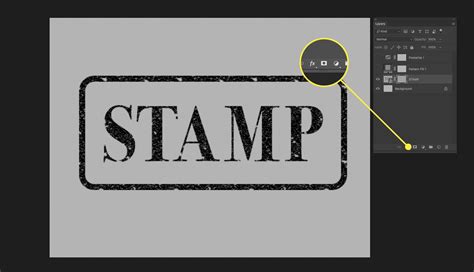
Layer Styles in Photoshop are powerful tools for adding depth and subtle effects to your text. An Inner Shadow can create the illusion of depth, making the text appear pressed into the surface.
With your text layer selected, go to Layer > Layer Style > Inner Shadow. Experiment with the settings to achieve the desired depth and darkness. Furthermore, activating the Inner Glow effect can add a subtle halo or a slightly raised appearance to the edges of your text, mimicking how ink might spread or catch the light.
Utilizing Blending Options and Textures
The "Blending Options" within Layer Styles offer extensive control over how layers interact. For a grunge or metallic stamp look, integrating textures like those found in "Rusty Metal Textures" can be highly effective.
With the Layer Group selected (which might contain your text and outline), go to Layer > Layer Style > Blending Options. Open any of the textures included in a pack like the Rusty Metal Textures. You can then use these textures in conjunction with blending modes and opacity adjustments to create a worn, metallic surface for your stamp.
To further refine the texture, you can go to Image > Adjustments > Levels. This allows you to control the tonal range of the texture, deepening shadows and brightening highlights to match your desired stamp appearance. Once you have the texture looking just right, select all (Select > All) and then copy and paste it into your main document (Edit > Paste).
Super Easy Grunge Stamp Photoshop Typography Setup | Tutorial and Free Textures
Advanced Techniques: Compositing and Smart Objects
For more complex and nuanced stamp effects, advanced techniques involving compositing and Smart Objects become invaluable. These methods allow for greater control and non-destructive editing.
Layer Masks for Precision Control
Layer masks are fundamental for selective editing. They allow you to reveal or hide parts of a layer without permanently deleting pixels.
If you're working with an image that you want to transform into a stamp, such as a portrait, you can use a layer mask to isolate specific areas. Add a Layer Mask to the layer (e.g., the "Man Portrait" Smart Object). Then, select your brush tool, set the Foreground Color to #000000 (black), and paint on the mask to hide parts of the image. Painting with white will reveal them.
To add a grungy stamp texture to your work, you can create a new layer and call it "Stamp Lines." Add a Layer Mask to this "Stamp Lines" layer as well. This mask can then be used to control where the grunge texture appears, giving you precise control over the distressed look.
The Power of Smart Objects
Smart Objects are a cornerstone of non-destructive editing in Photoshop. When you convert a layer or a group of layers into a Smart Object, you can apply transformations, filters, and adjustments without permanently altering the original pixel data.
To turn your stamp elements into a Smart Object, hold Shift and click on all the relevant layers in the Layers panel. Then, right-click and select "Convert to Smart Object." This consolidates your design elements into a single, editable entity. You can then apply filters, such as a blur filter (Filter > Blur) if the edges seem too crisp, making them look more realistic.
Using Blend If Sliders for Texture Integration
The "Blend If" sliders, found at the bottom of the Layer Style dialog box, are incredibly powerful for blending textures and colors.
For example, if you have a portrait layer and want to integrate a texture that has a white background, you can use the "Blend If" sliders. Open the Layer Style window of the layer. Use the sliders called "This Layer" to remove the white color, allowing the underlying texture or color to show through more effectively. This is a crucial step for achieving realistic ink bleed or faded stamp effects.
Pasting Textures into Layer Masks
A sophisticated method for applying textures to a stamp effect involves pasting texture pixels directly into a layer mask.
First, load a texture as a selection. Click on the thumbnail of the texture layer and then click on the image itself. This loads the texture as a selection. Next, activate the layer mask thumbnail you wish to paste into. Hold Alt on Windows or Option on Mac and click the layer mask thumbnail. This will turn the mask white, showing you only the mask itself. Then, select Ctrl+V on Windows or Command+V to paste the textured pixels into the layer mask. Finally, click the eye icon in the Layers panel to hide the texture thumbnail, allowing you to see how your changes have affected the stamp.
Enhancing Realism: Brushes and Final Touches
The final details can elevate a good stamp effect to a truly convincing one. Photoshop brushes and subtle adjustments play a significant role here.
Leveraging Custom Brushes for Detail
Custom brushes can add a wealth of detail and realism to your stamp effect. For instance, brushes designed to mimic old envelope stamps or ink splatters can be invaluable.
Create a new layer and call it "Old Envelope Stamp Brushes." You can then use brushes from packs like "Old Envelope Stamp Brushes" to add a realistic old envelope effect or subtle ink bleeding around the edges of your stamp.
For creating unique textures, consider making your own brushes. To make a chain brush, for example, create a single clean chain link on a transparent background using the Ellipse Tool or Pen Tool. Once the link looks neat and centered, go to Edit > Define Brush Preset and save it. In the Brush Settings, increase the spacing so the links repeat evenly like a real chain.
Applying Filters for Aged Effects
Photoshop's Filter Gallery offers a range of artistic filters that can contribute to an aged or worn look. The "Spatter" filter, found under Filter > Brush Strokes, can create a spray-paint or ink-bleed effect, adding to the distressed nature of the stamp.
To apply this, first create a composite snapshot of your entire image and place it on its own layer. Then, navigate to Filter > Brush Strokes > Spatter.
Fine-Tuning the Effect
After applying textures and filters, fine-tuning is essential. Adjustments to lightness, smoothness, and contrast can dramatically alter the final appearance.
Use the Lightness and Smoothness sliders in filter settings to adjust the intensity of the effect. If the edges of your stamp appear too sharp, consider applying a subtle blur filter.
Magic Eraser for Transparency
In some scenarios, you might want a transparent background for your stamp, especially if you're creating a PNG graphic. After applying a Stamp Effect filter, you can use the Magic Eraser tool to click on the background pixels, making them transparent. Ensure you have the desired colors set as foreground and background before applying filters.
Exploring Pre-made Resources and Add-ons
While creating a stamp effect from scratch offers maximum control, pre-made resources and Photoshop add-ons can significantly speed up the process and provide professional-looking results.
Stamp Effect Kits and Add-ons
For those looking for a quick and effective solution, various kits and add-ons are available. These often include pre-designed PSD files with editable text effects, layer styles, and actions.
- Comprehensive Kits: Some kits offer 20+ ink stamp letterpress text effects all within a single PSD file, perfect for making a stamp in just a few clicks.
- Layer Style Add-ons: If you prefer working with layer styles, add-ons can provide sets of individual layer styles with different textures, along with grunge actions for irregular edges and color Photoshop actions.
- Thematic Packs: You can find specialized packs for specific aesthetics, such as coffee stamp outline designs or kits designed to give PNG designs a vintage, retro feel.
- Text Effect Packs: For designs focused primarily on text, packs of text effects can be particularly useful, offering various styles for stamp-like typography.
Subscription Services for Unlimited Downloads
Platforms like Envato offer subscription services where, for a flat monthly fee, you can download an unlimited number of stamp effect Photoshop add-ons, stamp images, stamp PNGs, and more. This can be a cost-effective solution for designers who frequently use such effects.
Beyond the Basics: Exploring Other Photoshop Effects
The techniques used for creating stamp effects can be adapted for other creative visual styles in Photoshop.
Flame Effects on Paths
For instance, the Flame Filter can be used to create an amazing flame effect on a path. This is perfect for generating fire text, glowing paths, and other dynamic designs.
Cloud Text Effects
Similarly, you can learn how to create cloud text in Photoshop by applying specific filters. This easy-to-follow process results in text that appears to be written with clouds.
AI-Powered Tools and Future Possibilities
The landscape of digital design tools is constantly evolving. Emerging AI-powered tools can reposition 2D objects into new angles almost instantly, hinting at future possibilities for creating complex visual effects with greater ease. While currently in beta, these advancements suggest a future where complex manipulations become more accessible.
The ability to convey authenticity and nostalgia through design is becoming increasingly important. Mastering the art of creating realistic effects like the rubber stamp in Photoshop is a valuable skill that allows designers to add unique touches and evoke specific moods in their work. Whether you're adding a vintage feel or experimenting with creative typography, the worn-out rubber stamp effect is versatile, visually appealing, and fun to create.