Creating a compelling portrait often hinges on more than just the subject; the background plays a crucial role in setting the mood, enhancing the overall aesthetic, and ensuring the subject stands out. Many photographers, especially those in the early stages of their careers, find themselves with portraits where the backdrop leaves much to be desired. This common challenge, characterized by uneven lighting, distracting wrinkles, or an overall lack of polish, can be effectively overcome with the powerful tools available in Adobe Photoshop. This guide will walk you through a step-by-step process to transform a less-than-ideal background into a smooth, professional studio backdrop, suitable for a wide range of photographic applications.
Preparing Your Image for Background Enhancement
Before diving into the intricacies of background manipulation, it's essential to prepare your base image. This involves performing standard retouching on your subject. For this tutorial, we will use a portrait of a friend, Maggie, where the initial skin retouching and basic contrast and brightness adjustments have already been completed. Focusing on the background is the primary objective here, so ensuring your subject is well-rendered first is paramount.
Upon examining the original image, you might notice that while the backdrop appears to be a pleasant gray, there are noticeable wrinkles at the bottom, and the colors and lighting lack the desired smoothness. These are the imperfections we will meticulously address. To ensure you have a safety net and can revert to the original state if needed, the first crucial step is to create a duplicate of your background layer. This is achieved by pressing Command/Ctrl + J. Once duplicated, it is advisable to turn off the visibility of this original layer by clicking the eye icon next to it in the layers panel. This preserved layer will serve as a backup throughout the editing process.
Seamlessly Masking Your Subject
The next critical phase involves isolating your subject from the background. Photoshop offers a powerful tool for this purpose: layer masks. A mask acts as a non-destructive way to hide or reveal parts of a layer. Instead of permanently erasing pixels with the eraser tool, a mask uses black and white to control transparency. Black conceals, while white reveals. This method provides immense flexibility and allows for easy corrections.
To begin the masking process, select the Lasso Tool from the toolbar. Hold down the Lasso Tool icon to reveal its variations, and choose the Magnetic Lasso Tool. This tool attempts to snap to edges based on color and contrast. Carefully trace the outline of your model. For more intricate areas or precise adjustments, you can switch to the regular Lasso Tool. While a drawing tablet can significantly aid in achieving clean selections, a steady hand with a mouse or trackpad can also yield excellent results.
Once your selection is complete, navigate to the top of the screen and click on the "Select and Mask" button. This action opens a dedicated workspace with numerous options for refining your selection. Within this workspace, set your View Mode to "On Layers". With your original background layer invisible, your model will now appear on a transparent background, allowing you to clearly see the edges of your selection.
The "Select and Mask" settings offer a range of parameters to fine-tune the mask. While these settings can be subjective and depend on the specific image, a good starting point that generally works well includes: Radius 12, Smooth 46, Feather 1.7, Contrast 54%, and Shift Edge -6%. It is highly recommended to check the "Remember Settings" box if you anticipate using similar selections for future images. After clicking "OK," you will have your masked layer.
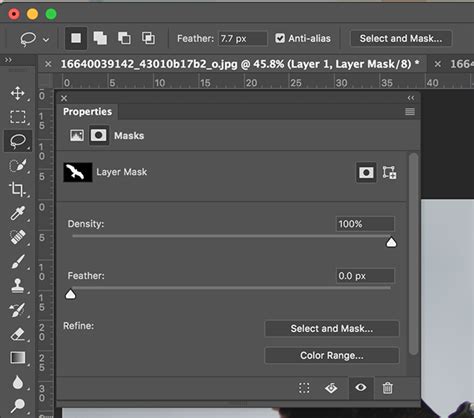
It's important to note that you can further refine your mask by directly interacting with it. Click on the mask thumbnail in the layers panel, and then use the Brush Tool. Painting with black will further hide parts of the layer, while painting with white will bring them back into view. This iterative process of selection, masking, and refinement ensures that your subject is perfectly isolated, with no stray pixels from the original background clinging to the edges. Once satisfied with the precision of your mask, you can proceed to the next stage: creating the new backdrop.
Constructing a Realistic Gradient Backdrop
With your subject cleanly masked, the focus shifts to constructing the new studio backdrop. While the possibilities are limitless, the aim here is to create a realistic and professional-looking background. A common and effective approach is to utilize the colors and lighting present in the original backdrop, reinterpreting them into a smooth gradient.
Before proceeding, ensure your image is set to RGB Color Mode and 16 Bits/Channel. RGB is the standard color mode for digital displays. Working in 16 Bits/Channel is crucial for achieving smooth gradients and a wider spectrum of colors, thereby preventing "banding." Banding refers to the visible, jagged lines that appear in gradients when there aren't enough color variations to create a smooth transition. This issue can also arise from over-smoothing the original backdrop, perhaps through techniques like frequency separation, and is exacerbated in 8 Bits/Channel mode due to its limited color palette. While 32 Bits/Channel offers the most color depth, it often results in excessively large file sizes and is generally unnecessary for this type of work.
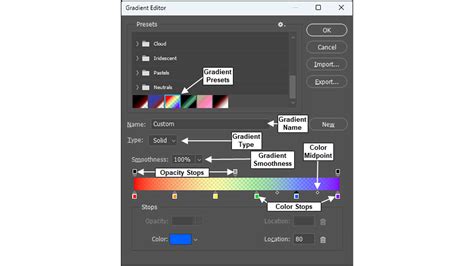
With your image correctly configured, create a new layer that will serve as the canvas for your gradient. Make your original background layer visible again so you can sample colors. Select the Gradient Tool from the toolbar (it might be nested under the Fill Tool). Click on the gradient preview in the options bar to open the Gradient Editor. Here, you can customize the colors of your gradient. Click on the small arrows below the color bar to adjust existing colors or click in the empty space below to add new color stops, allowing for more complex gradients.
On your newly created gradient layer, click and drag with the Gradient Tool to establish your backdrop. Experiment with different angles, lengths, and types of gradients (Linear and Radial gradients are often most effective for backdrops) until you achieve a pleasing composition. The goal is to create a base that looks natural and complements your subject.
At this stage, the gradient might appear a bit too perfect or uniform. To add depth and realism, it's beneficial to introduce subtle shadows and highlights. This can be achieved by adding additional gradient layers, using "Neutral Density" gradients. Creating separate layers for subtle black and white gradients, strategically placed, can simulate the natural fall-off of light and enhance the three-dimensionality of the backdrop. Don't be concerned about any minor banding that may appear at this point; the subsequent step will address this effectively.
Introducing Texture for Realism and Smoothness
The texture step is vital for achieving a smooth, professional, and artifact-free background. Start by creating another new layer. Use the Fill Tool to make this layer a uniform light gray. Next, navigate to Filter > Add Noise. Configure the noise settings to approximately 25 for the amount, select Gaussian distribution, and ensure Monochromatic is checked. Click "OK."
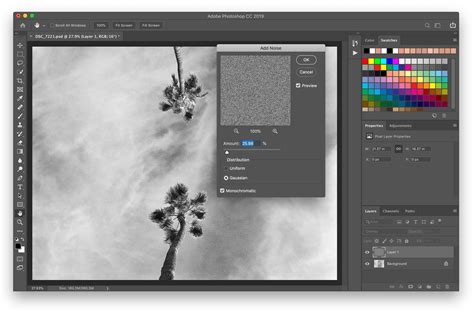
Now, change the Layer Style of this noise layer to Linear Light. This blending mode will effectively integrate the noise pattern with the underlying gradient layers. Following this, adjust the Opacity of the noise layer. A range of 5-15% is typically sufficient. The precise opacity will depend on the specific colors of your backdrop. The objective is to zoom in closely and increase the opacity just enough so that the noise subtly breaks up any remaining banding, making it virtually disappear. While some faint traces of banding might still be perceptible at this zoom level, they will be entirely resolved once the background layers are merged.
To consolidate the background elements, select the three layers that constitute your backdrop: the main color gradient, any neutral density gradient layers, and the noise layer. Press Command/Ctrl + E to merge them into a single layer. This process results in a background that is smooth, evenly textured, and completely free of distracting banding.
Final Touches and Refinements
With the background meticulously crafted, it's time for the final crucial step: ensuring seamless integration between your subject and the newly created backdrop. Revisit the masked layer of your subject. Carefully inspect the edges for any remaining stray pixels or remnants from the original background. If you discover any such artifacts, you can use the Brush Tool on the mask (with black to hide, white to reveal) to clean them up.
In some instances, particularly with fine details like hair, stray strands might still reveal hints of the original background. To address this, you can employ Brightness/Contrast adjustment layers specifically targeted at these areas. By subtly adjusting the brightness and contrast of the affected hair strands, you can help them blend more harmoniously with the new backdrop, creating a more cohesive and believable final image.
Once you are completely satisfied with the integration and overall appearance, save your image. The result will be a portrait with a professional, seamless studio backdrop, significantly enhancing the visual appeal and impact of your photograph.
Glow Effect - Photoshop Tutorial | Glowing Effect
The principles behind creating these sophisticated studio backdrops in Photoshop, while seemingly complex, are rooted in a methodical approach to layering, masking, and subtle textural adjustments. The core idea is to build up the background from foundational elements, much like a painter layers colors and textures on a canvas. The use of gradients provides the base color and illumination, while the carefully applied noise layer acts as a sophisticated digital "grain" that smooths out transitions and introduces a realistic texture, mimicking the subtle imperfections of physical backdrops. This process, when executed with attention to detail, elevates a standard portrait into a polished, professional piece of art. The underlying concept of layering and subtle manipulation is not unique to backdrops; it's a fundamental aspect of digital image editing that allows for extensive creative control.
The techniques discussed here are built upon a foundation of essential Photoshop skills. Understanding layer masks is paramount, as they offer non-destructive editing capabilities, allowing for revisions without permanent alteration of the original pixels. The ability to precisely select and mask subjects, whether through tools like the Magnetic Lasso or the more advanced Select and Mask workspace, is a prerequisite for any composite image work. Furthermore, mastering gradient creation and application, including the customization of color stops and the application of different gradient types, is key to building a visually appealing base. The addition of noise as a texture enhancer, when blended correctly using layer modes like Linear Light and adjusted for opacity, demonstrates a nuanced understanding of how to add subtle details that contribute to realism.
It is worth noting that the effectiveness of these techniques can also be influenced by the quality of the original photograph. A well-lit subject with a relatively clean initial background will always provide a better starting point. However, the power of Photoshop lies in its ability to correct and enhance, turning even challenging starting images into polished final products. The iterative nature of the process â masking, creating gradients, adding texture, and refining â allows for continuous improvement and fine-tuning until the desired aesthetic is achieved.
Beyond this specific application, the underlying principles of digital compositing and background creation are widely used in various fields, from advertising and commercial photography to digital art and visual effects. The ability to seamlessly blend elements and create believable environments is a highly sought-after skill. The methodical approach outlined in this guide, moving from subject isolation to background construction and final refinement, provides a robust framework that can be adapted to a multitude of creative projects within Photoshop and similar image editing software. The emphasis on non-destructive workflows and the use of subtle details to enhance realism are hallmarks of professional digital imaging.
The concept of using subtle noise to smooth gradients and prevent banding is a clever application of digital artifacts to achieve a desired visual outcome. In essence, by introducing a controlled amount of random pixels, we disrupt the predictable patterns that lead to banding, creating a much more organic and pleasing transition. This is a testament to the fact that sometimes, introducing a controlled imperfection can lead to a more perfect final result. The choice of 16 Bits/Channel further supports this, providing a larger color space for these subtle transitions to occur without being constrained by the limitations of 8-bit color depth.
The process, while detailed, is designed to be approachable. By breaking down the task into distinct steps â preparation, masking, gradient creation, texturing, and final touches â it becomes manageable even for those with intermediate Photoshop experience. Each step builds upon the previous one, culminating in a professional-quality result. The ability to revisit and refine each stage, thanks to non-destructive techniques like layer masks and adjustment layers, ensures that the final output meets the highest standards. This methodical approach not only leads to better results but also serves as an excellent learning experience, reinforcing fundamental Photoshop concepts.