When you are creating animations, you need to give special attention to the texturing of the models, as it brings life to your digital creations. It also makes your animated designs appear realistic and visually attractive to the public. However, achieving high-quality textures is difficult, especially for beginners or those with limited tools. Although Blender has many features for texturing, it sometimes fails to provide accurate results for advanced projects. That's why you should also use Substance Painter, which offers advanced tools that are specifically designed for professional texturing. As you'll need addons to integrate both tools, it often leaves users confused about how to create seamless workflows.
Unlocking Potential: The Synergy of Blender and Substance Painter
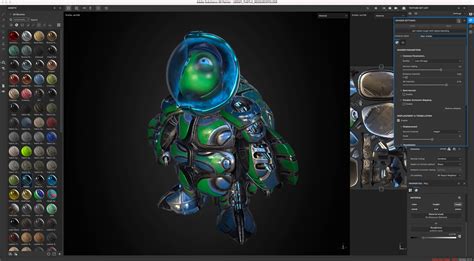
Blender provides the foundational structure for your 3D models, serving as the canvas upon which complex digital worlds are built. Substance Painter, on the other hand, takes these meticulously crafted models and elevates them to a new level of realism and visual fidelity through its advanced texturing capabilities. By strategically combining the strengths of Blender and Substance Painter, artists can unlock a workflow that not only maximizes creative expression but also consistently delivers breathtakingly realistic results. This powerful synergy is particularly beneficial for complex projects that demand a high degree of visual polish.
The advantages of this integrated approach are multifaceted. Substance Painter offers a suite of specialized tools that are indispensable for professional-grade texturing. These include sophisticated procedural texturing techniques, which allow for the generation of intricate patterns and details algorithmically; intelligent smart masks, which enable non-destructive and adaptable application of textures based on surface properties; and a dynamic material system that reacts realistically to lighting and environmental conditions. These features empower artists to achieve a level of detail and realism that would be exceedingly challenging to replicate within Blender alone.
Furthermore, the intuitive interface and automation options inherent in Substance Painter contribute significantly to time efficiency. This means that the Blender-Substance combination allows you to texture even the most complex models at a much faster pace than traditional methods. This acceleration is crucial in production pipelines where deadlines are often tight. The tool’s extensive library of high-quality materials, versatile brushes, and impactful effects further enables the creation of professional textures that possess a stunning visual appeal, regardless of the intended environment or application.
A key benefit of using Substance Painter is its non-destructive workflow. This methodology ensures that you can make changes to your textures at any stage of the process without negatively impacting other aspects of your work. This flexibility is invaluable for iteration and refinement, allowing artists to experiment with different looks and feel confident that they can revert or adjust without starting from scratch. When it comes to integrating these enhanced models back into Blender, the Substance Painter-Blender combination also simplifies the often-complex process of exporting textures. This streamlined export ensures that the detailed work done in Substance Painter translates accurately back into your Blender scene.
Establishing the Workflow: From Blender to Substance Painter and Back
While the benefits of the Substance-Blender combination are clear, beginners might encounter initial hurdles when attempting to utilize both tools simultaneously. A structured approach can demystify this process and pave the way for a smooth workflow.
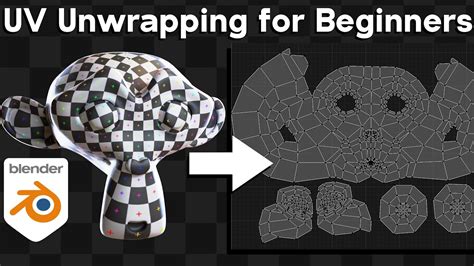
The journey begins in Blender. Start by creating your base 3D model. This can be achieved using primitive shapes like cubes, spheres, or cylinders, which can then be sculpted or modified to form the desired object. Once the basic geometry is established, the crucial step of creating a UV map is necessary to prepare your model for effective texturing. This process essentially flattens the 3D surface of your model into a 2D representation, allowing you to apply textures accurately.
To create a UV map in Blender, select your 3D model. Navigate to the “Properties” Panel, and within that, click on the “Object Data” tab. You will find a section dedicated to “UV Maps.” Click the “+” button to generate a new UV map. Subsequently, transition to the “UV Editing” workspace. Here, enter “Edit Mode” for your model, typically by pressing the “Tab” key. With all faces of your model selected (usually by pressing the “A” key), you can then begin the process of unwrapping. For optimal results, consider using Blender's various UV unwrapping tools, such as “Smart UV Project” or marking seams and using “Unwrap,” depending on the complexity of your model. This ensures that the UV islands are laid out efficiently and with minimal distortion.
Once the UV mapping is satisfactorily completed within Blender, the next step is to export your model in a format compatible with Substance Painter. When exporting, particularly if you intend to bake details from high-poly to low-poly models or if you are concerned with normal map accuracy, ensure that “Tangent Space” is enabled under the “Geometry” export settings. This is vital for the accurate interpretation of normal maps, which define surface detail and shading.
When importing your model into Substance Painter, it's recommended to select “Auto-unwrap” under the “Import Settings.” While you have already created a UV map in Blender, this option in Substance Painter can sometimes help in proper handling and optimization of the UV map for its texturing engine, especially by ensuring correct UV channel usage.
After completing the texturing process in Substance Painter, you will export the generated texture maps. These maps typically include Base Color, Roughness, Metallic, Normal, and Height maps, among others, depending on your shader setup. These exported textures are then imported back into Blender for rendering.
To do this, import your now textured model from Substance Painter back into Blender. Navigate to the “Shading” workspace. Here, create a new material for your model. You will then need to add “Image Texture” nodes for each of your exported texture maps. Load the corresponding exported files into each of these nodes (e.g., the Base Color texture into the Base Color node, the Roughness texture into the Roughness node, and so on). Connect these texture nodes to the appropriate inputs of your Principled BSDF shader in Blender. For the Normal map, you will need to add a “Normal Map” node between the Image Texture node and the Normal input of the Principled BSDF shader, ensuring the color space of the Normal map texture is set to “Non-Color.”
Enhancing Realism and Performance: Rendering and Cloud Solutions
Once you have applied the desired material and texture changes to your model within Blender, the subsequent step involves initiating the rendering process to achieve a polished and realistic final output. Blender possesses robust built-in rendering capabilities, powered by engines like Cycles and Eevee, that can effectively accomplish this task. However, realizing the full potential of these advanced rendering engines, especially for complex scenes with intricate lighting and high-resolution textures, often requires substantial computational power. Consequently, users will typically require advanced computer hardware to carry out this task efficiently on their local machines.
The combination of Blender and Substance Painter, while empowering for creative endeavors, inherently places a significant demand on your hardware system. The intricate details and high-resolution textures generated in Substance Painter, when brought into Blender, can strain your CPU and GPU, leading to prolonged render times. This is particularly true for users working on demanding animation projects or those aiming for photorealistic visuals.
Since not everyone has access to high-end, expensive PC builds that can seamlessly handle such intensive processing loads, exploring alternative solutions becomes a practical necessity. In such scenarios, utilizing render farm services emerges as a highly advantageous option. These services provide access to a vast network of powerful computers, allowing you to offload your rendering tasks to the cloud. This liberates your local system, enabling you to continue working on other aspects of your project or even start new ones without being bottlenecked by rendering times.
For those looking to simplify and significantly speed up their animation rendering process, a platform like Fox Renderfarm is an ideal solution. This service manages your rendering tasks through its scalable cloud servers, ensuring that your projects are completed efficiently and often much faster than local rendering. By leveraging such a service, you can dedicate your focus solely to the creative aspects of your work-designing characters, building environments, and bringing your animated visions to life-while the rendering is handled with expert efficiency.
The integration of cloud rendering services is further facilitated by features such as API integration. This allows for a more streamlined and accessible rendering process, enabling automated submission of render jobs and better control over your render queue. For users operating under tight deadlines, these services typically support high transfer speeds for uploading your project files and downloading the final renders, minimizing downtime.
Security and privacy are paramount when sharing your digital assets. Reputable render farm services, such as Fox Renderfarm, are often ISO certified (e.g., ISO27001), providing a secure environment for your designs and ensuring that your intellectual property is protected. Furthermore, these platforms typically offer flexible rendering options, supporting both CPU and GPU rendering to accommodate various project needs and optimize performance. The availability of plugins and services across all major operating systems, including Mac, Windows, and Linux, ensures broad compatibility and accessibility for a diverse user base.
Preparing Models for Substance 3D Painter in Blender | Adobe Substance 3D
Bridging the Gap: The Power of the Substance Painter Blender Addon
The development of dedicated addons plays a pivotal role in enhancing the interoperability between powerful software packages. The Substance Painter Blender addon is a prime example of such an integration, specifically designed to bridge the gap between these two programs and significantly improve workflow efficiency. This addon facilitates a more seamless transition of assets and materials, reducing manual steps and potential points of error.
One of the most significant advantages offered by the addon is the ability to directly import Substance materials into Blender. This eliminates the tedious process of manually exporting texture maps from Substance Painter and then importing them as individual Image Texture nodes within Blender. Instead, the addon allows these sophisticated materials, with all their layers, effects, and parameters, to be brought directly into your Blender scene.
Moreover, the addon provides direct access to Substance Painter's extensive material library within Blender itself. This means you can browse, select, and apply high-definition textures and materials created in Substance Painter without ever leaving the Blender environment. This level of integration dramatically speeds up the texturing and look-development phase of your projects.
A particularly powerful feature supported by the free plugin is its real-time update capability. This is a game-changer for iterative workflows. Any modifications or adjustments you make to a material in Substance Painter are immediately reflected in Blender. This instant feedback loop allows artists to see how their texture changes impact the final look of the model in real-time, facilitating quicker decision-making and more dynamic creative exploration. This continuous synchronization is incredibly beneficial for both seasoned professionals, who can fine-tune complex materials with ease, and beginners, who can learn and experiment with immediate visual results. The overall simplification of the entire texturing and material application process ensures greater consistency and accuracy across your digital assets.
Encountering challenges when performing advanced functions within Blender is a common experience for many 3D artists. Fortunately, many of these obstacles can be effectively addressed by adopting the Blender-Substance combination. This integrated approach allows for far more comprehensive and nuanced texturing of your characters and models, leading to more compelling and believable digital creations. By utilizing these tools in tandem, you can leverage the unique strengths of each software package to achieve results that would be difficult, if not impossible, with a single application.
However, it is crucial to acknowledge that these sophisticated tools, when used together, place considerable demands on your system's hardware. The processing power required for detailed texturing, baking, and rendering can quickly overwhelm standard computer configurations. Therefore, finding ways to offload your system's workload is not merely a convenience but often a necessity for efficient production. Among the various available solutions, employing a cloud render farm service stands out as one of the most effective methods to easily free up your system resources and accelerate your rendering pipeline. This strategic use of external computing power ensures that your creative workflow remains fluid and unhindered by hardware limitations, allowing you to focus on what you do best: creating stunning 3D art.