This tutorial delves into the creative process of designing eye-catching text balloon effects within Adobe Photoshop. We will explore techniques ranging from initial text creation and vector manipulation to the application of intricate layer styles and filters, ultimately leading to a polished, three-dimensional appearance. This guide is designed to be accessible to users with varying levels of Photoshop expertise, from those just beginning their design journey to seasoned professionals seeking new creative avenues.
Setting Up Your Canvas and Grids
To begin, a precise and controlled working environment is essential. We will start by creating a new document with specific dimensions: 600 pixels in width and 400 pixels in height. This size provides ample space for detailed work while remaining manageable.
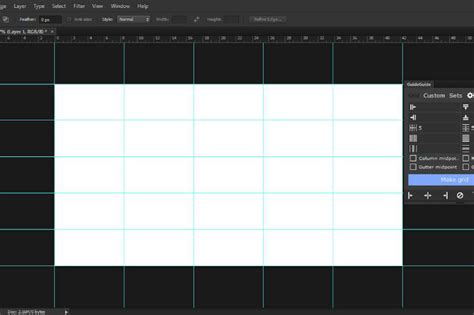
Once the document is created, it's crucial to enable the grid and snapping features. Navigate to View > Show > Grid to activate the visual grid overlay. Subsequently, go to View > Snap To > Grid to ensure that your design elements align precisely with the grid lines. This snapping functionality is invaluable for maintaining symmetry and achieving clean, professional results.
For further customization of the grid, press Control + K to open the Preferences window. Within the Guides, Grid & Slices section, you can fine-tune the grid spacing and subdivisions to suit your workflow. While the grid is a powerful tool for precise placement, it can sometimes obscure the finer details of your design. Therefore, you can toggle its visibility on and off using the shortcut Control + ‘ as needed, allowing for a clearer view of your work in progress.
To efficiently navigate your canvas, familiarize yourself with the zoom shortcuts: Control + - to zoom out and Control + + to zoom in. These shortcuts will enable you to seamlessly switch between a broad overview of your design and a close-up inspection of intricate details.
Initial Text Creation and Vector Conversion
The foundation of our text balloon effect lies in the initial text creation. For this tutorial, we will utilize the "Sausages" font, a choice that lends itself well to the rounded, inflated aesthetic we aim to achieve. Alternatively, you can select any font that complements your desired style.
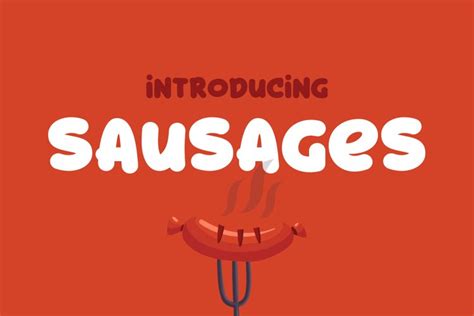
In Photoshop, open the image you have chosen as your "Background." This image will serve as the backdrop for your text balloon. Next, select the "Type Tool" (T) from the toolbar. Choose your desired font, in our case, "Sausages," and set the "Fill" color to White. It is often practical to start with a single letter, especially when working with computationally intensive 3D rendering processes, as this can save significant processing time and RAM.
After typing your initial letter, we will transform it into a vector shape. This conversion allows for more precise manipulation of the letter's form. With the text layer selected, click the "Create 3D from Text" button, which is typically found on the Top Menu. A pop-up window will appear, prompting you to use the "3D Workspace." Click "Yes" to enter this specialized environment. It's worth noting that a similar effect can be achieved by applying 3D properties to pre-existing "Shapes" using the "3D Panel."
Sculpting the 3D Form with 3D Settings
Within the "3D Panel," we will now begin to shape our text into a balloon-like form. Click on the "Mesh" button and select "Pillow Inflate" as the "Shape Preset." This preset will give the text a rounded, inflated appearance. For the "Extrusion Depth," set the value to "0 px." While this might seem counterintuitive for a 3D effect, it's a crucial step for achieving the specific balloon aesthetic we're aiming for, allowing us to focus on the surface deformation rather than external depth.
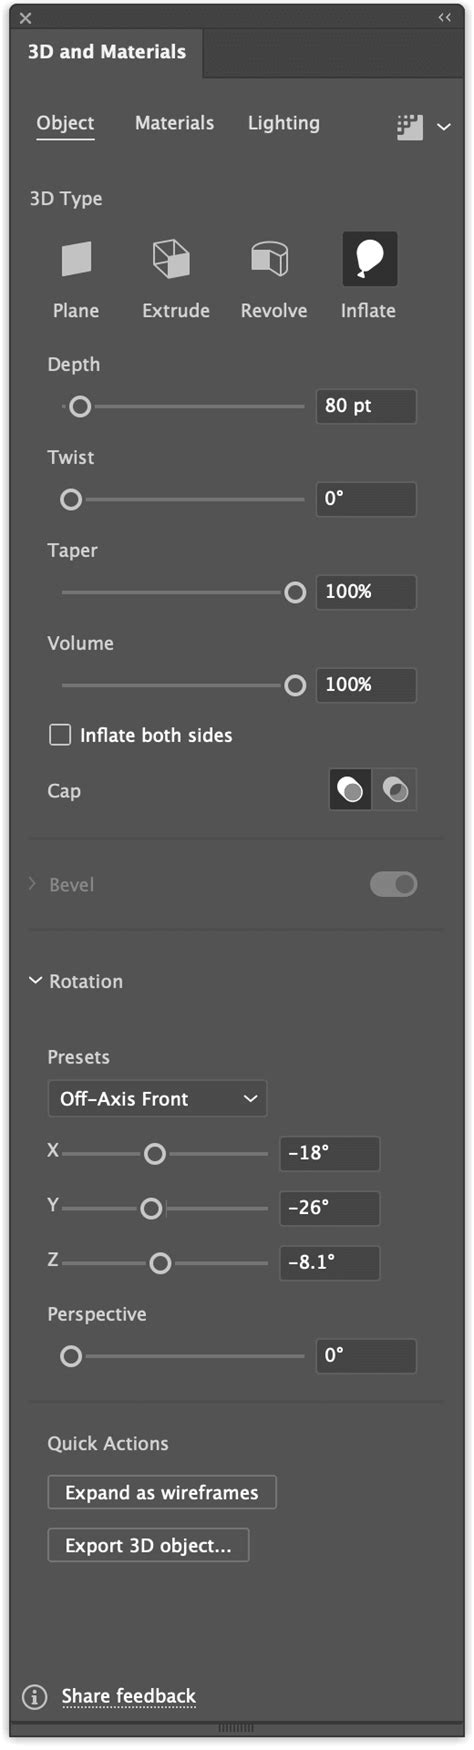
Next, navigate to the "Cap" button or sub-menu. Ensure that "Front and Back" is selected for "Sides." For the "Bevel," use a "Width" of 4% and an "Angle" of 44°. For the "Contour," select the "Cone" shape. These settings will define the subtle edges and contours of our inflated text, contributing to its realistic form.
Returning to the "Mesh" sub-menu, use the "Orbit 3D Camera" tool to rotate your image slightly. Experiment with different angles until you are satisfied with the overall shape and how the light interacts with it. Once you're happy, click the "Render" button at the bottom of the "3D Panel." Be aware that this rendering step can be time-consuming, depending on your computer's processing power.
Refining the Rendered Text and Adding Color
After the rendering process is complete, right-click on the thumbnail of your rendered letter in the "3D Panel" and choose "Convert to Smart Object." This step is vital as it allows for non-destructive editing, meaning you can make further adjustments and filters without permanently altering the underlying pixel data.
To introduce color, we will use adjustment layers. In the "Adjustments Panel," create a "New Hue/Saturation Adjustment Layer." If you wish to make your letter "Red," use the following values: Hue: 0, Saturation: 100, Lightness: 0. Feel free to experiment with these values to achieve any color you desire. Crucially, clip this adjustment layer to the layer directly beneath it (your rendered text layer) by clicking the small clipping mask button at the bottom of the "Adjustments Panel." This ensures that the color adjustment only affects the text and not the background.
Next, change the "Blending Mode" of this "Hue/Saturation" layer to "Color Burn." This blending mode will interact with the underlying colors of the rendered text to create a richer, more vibrant hue.
Applying Stylistic Filters for Texture and Depth
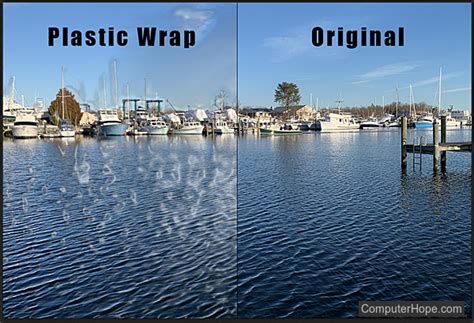
To further enhance the balloon-like texture and visual appeal, we will apply a series of filters. Go to Filter > Filter Gallery > Artistic > Plastic Wrap. Use the following values: Highlight Strength: 15, Detail: 7, Smoothness: 12. These settings will impart a smooth, slightly glossy surface reminiscent of inflated plastic.
Following this, navigate to Filter > Distort > Wave. Apply the following values: Type: Sine, Wavelength: 1 to 10, Amplitude: 1 to 5, Horizontal Scale: 100%, Vertical Scale: 100%. These wave distortions will add subtle undulations to the surface, enhancing the organic, inflated feel of the balloon text.
Addressing Shadows and Color Lookup
During the design process, you might notice that the "Shadow" of your letter doesn't appear as realistic as desired. To rectify this, we can enter the "Smart Object" to make direct edits. Double-click on the "Smart Object" thumbnail in the "Layers Panel." This will open the rendered letter in a new Photoshop file. Here, you can refine the shadow by using brushes or other tools. Once you have made the necessary adjustments, save and close this new file. The changes will automatically be reflected in your original document.
To add a final touch of color grading and atmosphere, create a "New Color Lookup Adjustment Layer." Select "Crisp_Warm.look" as the "3DLUT File" value. This adjustment layer will apply a pre-defined color grading preset, often enhancing warmth and contrast, further solidifying the visual style. Remember to clip this layer to the text layer as well, ensuring the color lookup only affects your text.
Crafting the Decorative Rope Ornament
To complete the text balloon effect, we will add a decorative "Rope" as an ornament. Create a "New Layer" positioned on top of your "Background" layer. Select a small, hard brush (approximately 30 pixels in size) and set your "Foreground" color to Black.
Paint a "Thread" originating from your text shape and extending towards the bottom of your file. This thread will act as the base for our rope. Now, double-click on the layer's thumbnail to open the "Layer Styles" dialog box. Apply the following styles:
Bevel & Emboss:
- Style: Inner Bevel
- Technique: Smooth
- Depth: 100%
- Direction: Up
- Size: 5 px
- Soften: 0 px
- Shading: Angle: 120°, Altitude: 30°, Gloss Contour: Ring - Double, Highlight Mode: Screen, Opacity: 75%, Shadow Mode: Multiply, Opacity: 75%
Contour:
- Contour: Linear
- Range: 50%
Texture:
- Pattern: Woven Flat (This pattern can be found in Photoshop's default patterns or imported if you have custom ones.)
- Scale: 100%
- Depth: 100%
Name this layer "String."
Adding the Base and Final Touches
To create a solid base beneath the text and rope, create a "New Layer" directly above the "String" layer and name it "Bottom." On top of this "Bottom" layer, add two "Adjustment Layers": a "Hue/Saturation" and a "Color Lookup" layer, identical to the ones you applied to the text. Ensure these adjustment layers are clipped to the "Bottom" layer.
Now, draw a small triangular shape that sits just beneath your main text "Letter" but on top of the "String" layer. Fill this shape with White. This triangle will serve as a subtle visual anchor point.
Double-click on the "Bottom" layer's thumbnail to access its "Layer Styles." Apply the following:
Bevel & Emboss:
- Gloss Contour: Ring - Double
- Color: #ffffff
Stroke:
- Size: 2 px
- Position: Outside
- Blend Mode: Normal
- Opacity: 100%
- Pattern: Ant Farm (This pattern provides a subtle textured outline.)
Satin:
- Color: #ffffff
- Blend Mode: Multiply
- Opacity: 75%
- Angle: 90°
- Distance: 10 px
- Choke: 0 px
Drop Shadow:
- Color: #000000
- Blend Mode: Multiply
- Opacity: 75%
- Distance: 5 px
- Spread: 0%
- Size: 5 px
With these steps completed, you will have successfully created a visually appealing text balloon effect in Photoshop.
Alternative Approach: Layer Styles and Distort Filters
This section outlines an alternative method for achieving a text balloon effect, focusing on layer styles and distort filters, which can be more accessible for users less familiar with Photoshop's 3D features.
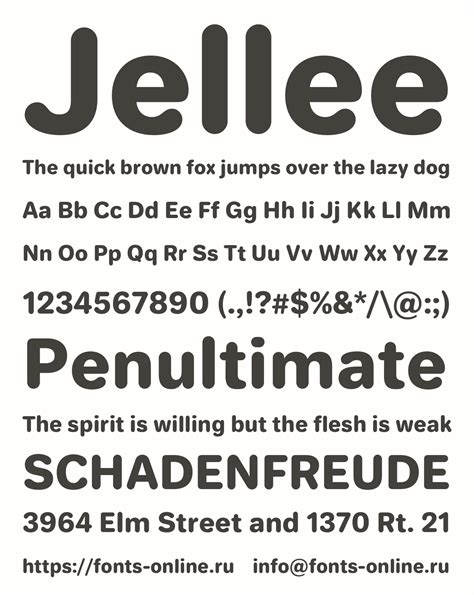
For this tutorial, we will use an image of the sky with clouds as our "Background," and the free font "Jellee" from Alfredo Marco Pradil.
Open Background and Type Text: In Photoshop, open your chosen background image. Select the "Type Tool" (T) and type your desired text. Choose a font you like; in our case, we used "Jellee." The size of your text will depend on the dimensions of your background image. Use White as the "Fill" color for initial clarity.
Adjust Letter Placement: To position your letters in different arrangements, select the individual letter you wish to move. Then, change the "Baseline Shift" value in the "Character" window. Repeat this process for each letter, experimenting with both positive and negative numbers, until you are satisfied with the overall letter placement and composition.
Convert to Smart Object: Right-click on your text layer and select "Convert to Smart Object" from the contextual menu. This ensures that all subsequent layer styles and filter applications will be non-destructive.
Apply Layer Styles: Double-click on the text layer to open the "Layer Styles" dialog box. Apply the following styles:
Bevel & Emboss:
- Style: Inner Bevel
- Technique: Smooth
- Depth: 100%
- Direction: Up
- Size: 10 px
- Soften: 5 px
- Shading: Angle: 120°, Altitude: 30°, Gloss Contour: Ring - Double, Highlight Mode: Screen, Opacity: 75%, Shadow Mode: Multiply, Opacity: 75%
Contour:
- Contour: Cone
- Range: 50%
Inner Shadow:
- Color: Use a color sampled from your background image (e.g., #1b7cc1 for a blue sky).
- Blend Mode: Multiply
- Opacity: 75%
- Angle: 120°
- Distance: 10 px
- Choke: 0%
- Size: 15 px
Inner Glow:
- Color: Use a lighter shade of the color used for the Inner Shadow (e.g., #5494c2).
- Blend Mode: Screen
- Opacity: 75%
- Technique: Softer
- Source: Center
- Choke: 0%
- Size: 20 px
Satin:
- Color: #000000
- Blend Mode: Multiply
- Opacity: 50%
- Angle: 90°
- Distance: 15 px
- Choke: 0%
Gradient Overlay:
- Colors: #78797a and #ffffff, alternated.
- Locations: 0%, 25%, 50%, 75%, and 100%.
- Style: Linear
- Angle: 90°
Drop Shadow:
- Color: #000000
- Blend Mode: Multiply
- Opacity: 50%
- Distance: 10 px
- Spread: 0%
- Size: 10 px
Apply Spherize Filter: Select your text layer and go to
Filter > Distort > Spherize. Use an "Amount" of 25%. This filter will give the letters a rounded, spherical appearance, enhancing the balloon-like quality.Apply Wave Filter: Next, go to
Filter > Distort > Waves. Use the following values: Type: Sine, Wavelength: 1 to 10, Amplitude: 1 to 5, Horizontal Scale: 100%, Vertical Scale: 100%. This filter adds subtle surface undulations, contributing to the organic feel.Create Selection for Coloring: To color your letters,
Command/Control-click on your text layer's thumbnail in the "Layers" window. This will create a selection around your text.Add Hue/Saturation Adjustment Layer: Go to the "Adjustments" window (or click the small adjustment icon at the bottom of the "Layers" window) and create a "New Hue/Saturation Adjustment Layer." Since you have an active selection, a "Mask" will automatically be created for this adjustment layer, ensuring that the color adjustments only affect your text. Now, you can manipulate the "Hue," "Saturation," and "Lightness" sliders to color your text.
Individual Letter Coloring: If you desire each letter to have a distinct color, you will need to repeat "Steps 7 and 8" for each individual letter. To exclude certain letters from the selection, use the "Subtract from Selection" option in the "Options Bar" (when a selection tool is active) and then use the "Rectangular Marquee Tool" (M) to draw a rectangle over the letter you wish to deselect.
Experiment with Adjustments: Feel free to experiment with other types of "Adjustment Layers," such as "Color Balance" or "Curves," to achieve unique and varied results for your text balloon designs.