Adobe Photoshop offers a robust suite of tools for manipulating text, extending far beyond simple paragraph entry. While many users are familiar with the basic text tool, Photoshop's capabilities for creating and customizing text boxes are significantly more versatile. This tutorial delves into the fundamental methods of creating text boxes, resizing them, and then explores advanced techniques for incorporating text into custom shapes and using text boxes as design elements. Whether you're a beginner looking to understand the foundational aspects or an experienced user seeking to unlock new creative avenues, this guide will illuminate the multifaceted world of Photoshop text boxes.
Creating and Resizing Basic Text Boxes
The initial step in utilizing text boxes in Photoshop involves selecting the appropriate tool and defining the boundaries of your text area.
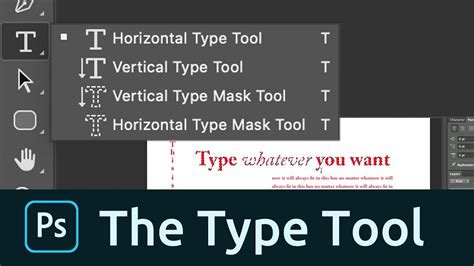
Selecting the Type Tool: Begin by choosing the "Type Tool" from the Photoshop toolbar. This tool is typically represented by an icon resembling the letter "T".
Drawing the Text Box: Once the Type Tool is active, click and drag on your canvas to draw a rectangular boundary. This action defines the size and shape of your text box. Upon releasing the mouse button, you will observe a blinking cursor within the box, indicating that you can now input text.
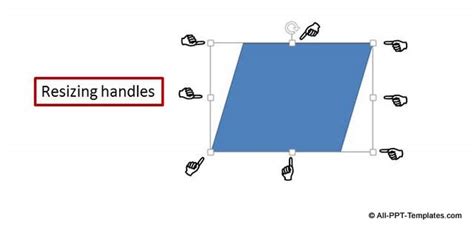
Resizing the Text Box: It's common to find that the initial size of your text box may not perfectly accommodate your content. Photoshop provides an intuitive method for resizing. To adjust the dimensions, simply click and drag on the diagonal corner handles of the bounding box. Dragging outwards will enlarge the text box, while dragging inwards will reduce its size.
A key feature to note is how Photoshop handles text within a resized box. By default, in some versions like Photoshop Elements (PSE), the software will automatically adjust the text size to fit proportionally within the newly defined boundaries. This ensures that your text remains legible and well-integrated, whether you're expanding the space for more content or contracting it to fit a specific design element.
Adding Dynamic Flair: The Warp Text Tool
For those who wish to move beyond standard rectangular text boxes, Photoshop offers the "Warp Text" feature, allowing for unique and dynamic text shaping.
Accessing the Warp Text Feature: After creating a text layer and inputting your text, you can access the Warp Text options. This is typically found in the Options Bar at the top of the screen when the Type Tool is active, often represented by an icon depicting a curved "T".
Applying Warping: Clicking on the Warp Text icon will open a dialog box. Here, you'll find a dropdown menu with various warping styles, such as "Arc," "Flag," "Wave," and "Fishtail." Selecting a style will immediately alter the shape of your text box and, consequently, the text within it.
Adjusting Warp Parameters: Each warp style comes with adjustable parameters, usually represented by sliders for "Bend," "Distortion," and "Horizontal/Vertical Alignment." By manipulating these sliders, you can fine-tune the intensity and appearance of the warp, creating a wide array of unique results. This tool is invaluable for adding visual interest and a sense of movement or artistic expression to your text.

Beyond Rectangles: Text within Custom Shapes
Photoshop's text capabilities extend to enclosing text within virtually any shape, not just predefined rectangles. This opens up a world of creative possibilities for design.
Method 1: Using Paths for Custom Shapes
One of the most robust methods for fitting text into custom shapes involves creating a path that precisely outlines your desired shape.
Creating a Custom Shape Path:
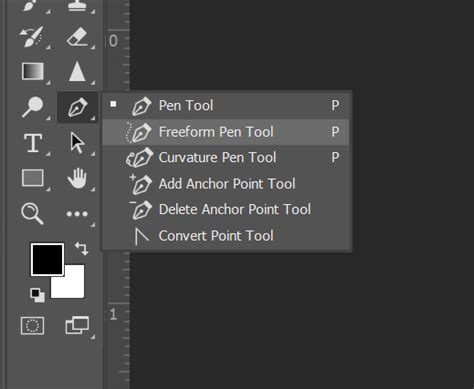
- Pen Tool: The Pen Tool is ideal for drawing precise paths. Select the Pen Tool from the toolbar. In the Options Bar, set the mode to "Path."
- Drawing the Shape: Click on your canvas to create anchor points, and drag to create curves. Continue this process until you have outlined the complete shape you desire. For straight lines, simply click between points. Holding the Shift key while drawing can help create perfectly straight horizontal, vertical, or diagonal lines.
- Shape Tool Alternative: Alternatively, you can use Photoshop's Shape Tools (Rectangle, Ellipse, Polygon, Custom Shape Tool). When using these tools, ensure that "Path" is selected in the Options Bar rather than "Shape" or "Pixels." Draw your shape as you normally would.
Adding Text to the Path:
- Select the Type Tool: Choose the Type Tool from the toolbar.
- Hover Over the Path: Move your cursor over the path you just created. The cursor icon will change, indicating that the text will now follow the path.
- Click and Type: Click on the path, and begin typing your text. The text will flow along the outline of your path.
Reshaping and Repositioning the Path: If you need to adjust the path after creating it, you can use the "Edit > Free Transform Path" command. This will display transformation handles around the path, allowing you to resize, rotate, or move it. You can also use the Direct Selection Tool (a white arrow) to manipulate individual anchor points and handles for more precise adjustments.
Method 2: The "Hack" for Text on a Shape (for versions without direct path text)
For older versions of Photoshop or Photoshop Elements (PSE) that might not have the direct path text capability, a clever workaround can be employed.
Create and Place the Shape: First, select the shape you want to use as a text container. You can use the Shape Tools or import a custom shape. Place this shape onto your document layer temporarily.
Approximate the Shape with Text:
- Select the Type Tool: Choose the Type Tool.
- Draw a Text Box: Draw a standard text box.
- Position and Resize: Carefully position and resize this text box to approximate the outline of your chosen shape. You can then input your text into this box.
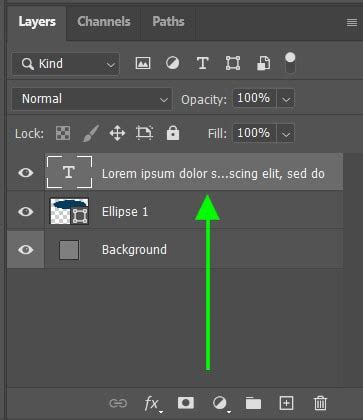
Layer Management: Because the text is on a separate layer from the temporary shape, you can hide the shape layer once you are satisfied with the text's approximation of its form. This method, while less precise than using paths, can still yield effective results for creating text that follows a general shape.
Text Boxes as Design Elements
Beyond simply containing information, text boxes themselves can be transformed into compelling visual components of your design.
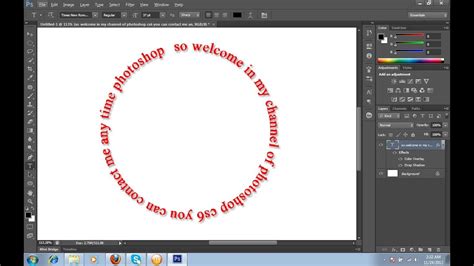
"Text on a Shape" Option: Photoshop allows you to write text directly onto a shape, following its contour. This is particularly effective for creating circular text, text along curved edges, or other stylized arrangements.
- Create a Shape: First, create the desired shape (e.g., a circle, a star) using the Shape Tools or by drawing a path.
- Use the Type Tool: Select the Type Tool. Hover over the edge of the shape until the cursor changes to indicate text-on-shape mode. Click and type. The text will conform to the shape's outline.
Styling Text Boxes: You can apply various layer styles to your text box layer to enhance its visual impact. This includes:
- Drop Shadow: Adds depth and separation.
- Outer Glow/Inner Glow: Creates glowing effects.
- Bevel and Emboss: Gives a raised or indented appearance.
- Stroke: Adds a border around the text box.
- Color Overlay: Fills the text box with a solid color.
These effects can transform a simple text box into a decorative element, a graphic accent, or a thematic embellishment within your layout.
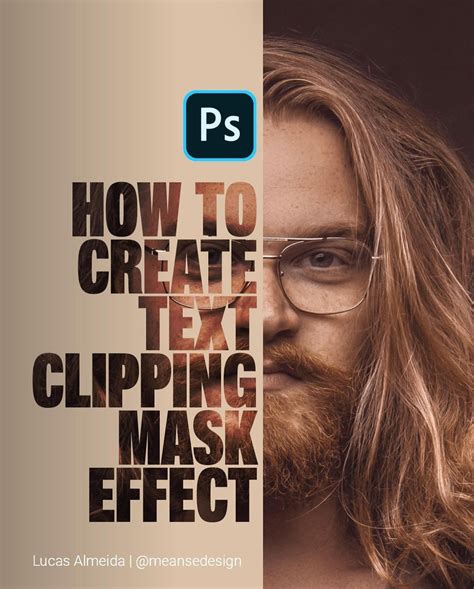
Using Text as a Clipping Mask: Another advanced technique is to use text as a clipping mask for an image or pattern.
- Place Image/Pattern: Import the image or pattern you want to use.
- Create Text: Create your text layer above the image/pattern layer.
- Create Clipping Mask: Right-click on the text layer and select "Create Clipping Mask." The image or pattern will now be confined within the boundaries of your text. This is a powerful way to integrate photos and graphics with typography.
Advanced Text Formatting and Control
For precise control over text appearance within any box or shape, Photoshop offers the Character and Paragraph panels.
Accessing the Panels: These panels are usually hidden by default but can be accessed via the "Window" menu in the Menu Bar ("Window > Character" and "Window > Paragraph").
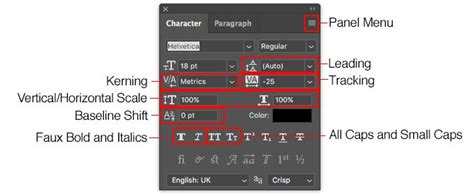
Character Panel: This panel provides granular control over:
- Font Family, Style, and Size: Standard typographic controls.
- Leading: The vertical space between lines of text.
- Kerning: The space between specific pairs of characters.
- Tracking: The overall space between characters in a block of text.
- Horizontal and Vertical Scaling: Adjusting the width or height of characters.
- Baseline Shift: Moving text up or down from its normal baseline.
- Color: Changing the text color.
Paragraph Panel: This panel focuses on the overall layout and alignment of text within a paragraph or text box:
- Alignment Options: Left, Center, Right, and various Justification options (e.g., Justify All, Justify Last Line). Justified text, in particular, can be very useful for making text fill the entire width of a shape or box neatly.
- Indentation: Setting first-line, left, and right indents.
- Spacing: Adjusting the space before or after paragraphs.
- Hyphenation: Controlling whether words can be hyphenated at the end of lines.
- Widow and Orphan Control: Preventing single lines of text from appearing at the top or bottom of a paragraph block.
Conclusion: Unleashing Textual Creativity
The text tools in Adobe Photoshop are far more dynamic than their basic appearance might suggest. From precisely defining text boundaries and effortlessly resizing them to warping text into unique forms and flowing it along custom paths, Photoshop empowers users to treat text not just as content, but as a vital design element. By mastering the Type Tool, understanding the nuances of the Warp Text feature, and leveraging the power of paths and custom shapes, designers can imbue their projects with unparalleled typographic creativity. Furthermore, the detailed control offered by the Character and Paragraph panels ensures that every aspect of text appearance can be meticulously refined. Experimenting with these techniques will undoubtedly unlock new possibilities and elevate the visual storytelling within your digital creations.