Adobe Photoshop offers a powerful and versatile tool known as the Threshold command, which allows users to transform images into high-contrast, black-and-white versions. This technique is particularly useful for creating stylized graphics, isolating specific elements, and significantly enhancing edge contrast. While its primary function is to convert images into stark black and white, the Threshold command, when combined with strategic layering and color manipulation, can unlock a unique and visually compelling "layered threshold" effect. This tutorial will guide you through the process of creating this effect, turning a full-color photograph into a dynamic one-color outline or a series of nuanced tonal variations.
Preparing Your Image for the Threshold Effect
Before diving into the Threshold command itself, proper image preparation is crucial for achieving the desired outcome. This involves isolating your subject from its background and creating duplicate layers to work with.
Isolating the Subject
The first step in our process is to open a photograph you wish to transform in Adobe Photoshop. For this technique to be most effective, it's beneficial to start with an image that has a relatively simple background, as this simplifies the selection process.
Using the Magic Wand tool, you can select the background. Ensure the "Contiguous" option is enabled in the Options Bar, and adjust the "Tolerance" level as needed to capture all similar colored areas. You may need to Shift-click to add additional areas to your selection. Once the background is accurately selected, navigate to Select > Inverse to select your main subject. To further isolate your subject, press Command-J (or Ctrl-J on a PC) to copy the selection to a new layer. It is then recommended to remove the visibility of the original Background layer by clicking its Eye icon in the Layers panel. This ensures you are working solely with your isolated subject.
Duplicating Layers for the Threshold Effect
The core of the layered threshold effect lies in applying the Threshold adjustment to multiple, duplicated layers of your subject. Press Command-J (or Ctrl-J) four times to create four identical copies of your subject's layer. These duplicates will serve as the foundation for building the different tonal levels of our effect.
Applying the Threshold Adjustment
With your duplicated layers in place, you can now begin applying the Threshold adjustment to each one, gradually increasing the threshold level. This process progressively simplifies the image, revealing different levels of detail at each stage.
Setting Initial Threshold Levels
In the Layers palette, begin with the top layer. Go to Image > Adjustments > Threshold. In the Threshold dialog box, you will see a slider beneath a histogram. Drag this slider to a Threshold Level of approximately 30 and click "OK." This initial setting will create a significant simplification of the image, revealing only the most prominent edges and details.

Next, hide the visibility of this top layer by clicking its Eye icon in the Layers panel. Select the second-to-top layer and repeat the process: go to Image > Adjustments > Threshold. This time, move the slider to a higher amount than in the previous step, around 60 in this example. This will reveal slightly more detail than the first layer.
Continue this process for the third layer from the top. Apply the Threshold adjustment again and move the slider to an even higher Threshold Level, such as 90. Finally, repeat this process one last time for the fourth layer from the top, setting the slider to an even higher value, for instance, 195. Each layer will now represent a different level of detail, from the most pronounced edges to finer nuances.
Colorizing the Threshold Layers
After establishing the distinct tonal levels of each layer, the next phase involves colorizing them to create the layered effect. This step transforms the black and white threshold outputs into a monochromatic scheme with varying shades.
Removing White from Threshold Layers
Before applying color, it's necessary to remove the white areas from each threshold layer. Make the top layer visible and active. Select the Magic Wand tool, set its Tolerance to 0, and turn off the "Contiguous" option. Click on a white area in the image. This will select all the white pixels across the layer. Press Delete (or Backspace on a PC) to remove them. Repeat this process for each of the four threshold layers.
Applying Color to Each Layer
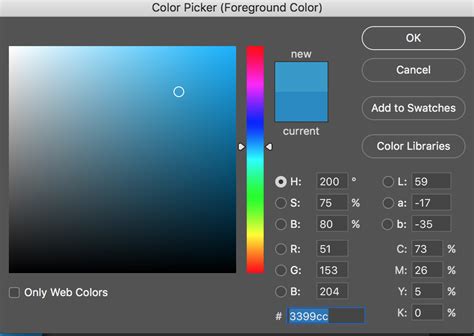
Now, it's time to introduce color. Make the top layer visible and active. Command-click (or Ctrl-click) on the top layer's thumbnail in the Layers panel. This action selects all the pixels in that layer. Next, change the Background color by clicking on its swatch in the Toolbox and selecting a dark shade of your chosen color, for example, a dark orange. Press Command-Delete (or Ctrl-Backspace) to fill the selected pixels with this new Background color.
Repeat this same process for the next layer down, but this time, select a slightly lighter shade of orange. To observe the effect so far, temporarily hide the visibility of the other layers, leaving only the two colored layers visible. Continue this technique for the last two layers, ensuring each layer is a varying shade of your chosen color. The general principle is that darker shades should be on the higher layers in the Layer palette's stacking order, while the background layers will be lighter. This arrangement allows the darker colors to reveal more intricate details, with the background layers providing a lighter foundation.
Advanced Techniques and Further Enhancements
The layered threshold effect, while visually striking on its own, can be further refined and adapted using additional Photoshop tools and techniques. These methods offer greater control and allow for unique artistic interpretations.
Vectorization and Color Adjustments
The resulting image, though created from a raster image, can appear to have a vector art quality due to its sharp edges and flat color areas. For further manipulation, you can place this layered composition into Adobe Illustrator and utilize its tracing capabilities to convert it into actual vector graphics.
Alternatively, within Photoshop, you can merge all the colored layers into a single layer. Once merged, you can apply a Hue/Saturation adjustment layer. This allows you to easily change the overall color scheme of your layered threshold effect, experimenting with different palettes to achieve diverse moods and styles.
Get Next-Level Colors With Gradient Maps In Photoshop
Utilizing Adjustment Layers and Masks
For more precise control over the Threshold effect, employing adjustment layers is highly recommended. Instead of directly applying the Threshold command to a layer, create a new Threshold adjustment layer (Layer > New Adjustment Layer > Threshold). This non-destructive approach allows you to modify the threshold settings at any time without permanently altering the underlying image data.
The Levels slider within the Threshold adjustment layer becomes your primary tool for fine-tuning the balance between black and white areas. Furthermore, understanding and utilizing layer masks and clipping masks is essential. Layer masks allow you to selectively reveal or hide parts of a layer, enabling intricate control over where the threshold effect is applied. Clipping masks, on the other hand, can be used to confine adjustments to specific layers, ensuring that modifications only affect the layer directly below them. By adjusting the opacity of these layers or adjustment layers, you can further fine-tune the intensity of the overall effect.
Enhancing Detail with Dodge and Burn
Before applying the Threshold adjustment, consider using the Dodge and Burn tools to selectively lighten and darken specific areas of the underlying image. The Dodge tool (which lightens pixels) can be used to bring out subtle details that might otherwise be lost in the thresholding process, while the Burn tool (which darkens pixels) can help to emphasize contours and edges, making them more prominent when the threshold is applied. This pre-processing step can lead to a more nuanced and detailed final result.
Exploring Gradient Maps and Photo Filters
The Gradient Map adjustment layer is another powerful tool that can be used in conjunction with the Threshold effect. A Gradient Map maps the luminance values of an image to a gradient. By applying a gradient map after creating your layered threshold effect, you can introduce sophisticated color transitions and variations. You can choose from existing gradients or create your own custom gradients within the Gradient Map dialog box. Experimenting with different gradient fills, reversing them, or adjusting their appearance can lead to unique and artistic outcomes, helping to reduce banding effects and enhance the visual richness.
The Photo Filter command, found under the Filter menu, can also be used to subtly alter the color temperature and balance of your image. Mimicking the effect of placing a colored filter in front of a camera lens, it allows you to apply a chosen color preset to impart a specific hue adjustment. This can be useful for correcting color casts or for creating deliberate color effects to complement your layered threshold design.
Understanding Threshold Limitations and Alternatives
It's important to note that the Threshold command might be grayed out if your image is in a color mode that does not support the effect, such as certain CMYK profiles. In such cases, converting your image to RGB mode will enable the Threshold adjustment.
When working with text, the Threshold effect can be applied, but you must first rasterize the text layer. This is done by right-clicking the text layer and selecting "Rasterize Layer" or "Rasterize Type." Once rasterized, the Threshold command can be applied.
While the Threshold command is excellent for creating high-contrast black and white images, other filters and adjustments can achieve similar or complementary effects. The Equalize filter, for instance, redistributes brightness values to more evenly represent the entire range of brightness levels. The Posterize filter allows you to specify the number of tonal levels for each channel, creating large, flat areas of color, which can be useful for graphic styles. Understanding how these tools interact with Threshold can expand your creative possibilities.
The Threshold effect itself is fundamentally about simplifying an image based on luminance levels. All pixels darker than the set threshold value are converted to black, and all pixels lighter are converted to white. This stark conversion is what makes it so effective for creating outlines and silhouette-like effects. Radius and threshold parameters in various Photoshop filters determine the intensity and area of their application, and understanding these concepts is key to controlling the outcome of your edits.
Mastering the Threshold tool in Photoshop, especially when employed in a layered approach with color adjustments, opens up a world of creative possibilities for transforming ordinary photographs into striking, stylized artwork. Consistent practice with these tools, from basic selections and layer duplication to advanced adjustment layers and filters, will undoubtedly lead to a deeper understanding and greater proficiency in manipulating visuals for your desired artistic impact.