Mastering Photoshop can be a challenge regardless of your skill level, but rasterizing images is something that every designer, photographer, or digital artist should know. Being able to convert images, text, shapes, or smart objects into pixels expands the creative possibilities of what you’re able to create. In essence, rasterization refers to the process of converting an image constructed of vector graphics (shapes) into one based on pixels. Changing an image to pixels makes it better suited for output on a video display or printer, and is a popular method of producing 3D graphics on a computer. The raster process provides a quick way to update an image so you can more easily apply certain adjustments or effects that only work with pixel layers.

The Core Concept: Raster vs. Vector Graphics
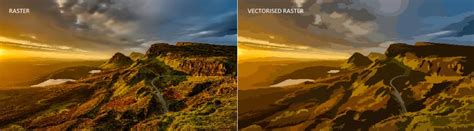
In Photoshop, we primarily work with two types of images: raster and vector. Raster images are made up of individual pixels. These images include photos and other more complex designs that benefit from the precise manipulation of pixels. Raster graphics, also referred to as rasterized images or bitmap images, are made of countless tiny squares called pixels. When you zoom way in, you’ll see the solid edges break down into jagged squares.
Vector images, on the other hand, are created using mathematical formulas to form shapes, which maintain their sharpness at any size source. Vector graphics use mathematical formulas to create smooth images scalable to any size. Their edges will be crisp no matter how much you zoom out or in. When working with vector layers in Photoshop, we have the ability to manipulate and transform vector shapes without losing quality. This is due to the fact that vector layers are resolution-independent.
What is Rasterization?
Rasterization is the process of converting vector graphics to raster or bitmap images. When we rasterize a layer in Photoshop, we convert that vector layer into pixels source. This alteration affects both the display and the editing capabilities of the layer. The process of rasterizing a vector graphic causes the clean lines of the image to break down into pixels with jagged edges. Rasterization adds pixel layers to the image, converting shapes into distinct pixels source. This process is crucial when working with vector images that need to be printed or saved as bitmap files, such as JPG or PNG source.
Why Rasterize in Photoshop?
Certain filters and effects can only be applied to rasterized layers. To rasterize a layer, we essentially convert the vector shapes from their mathematical representations into pixel-based images. This greatly increases our ability to edit or apply filters and effects to the layer. For example, certain tools in Photoshop work only on raster images, which are made of pixels instead of vectors. These include brush tools, the Eraser tool, the Paint Bucket tool, and certain filters like Blur.
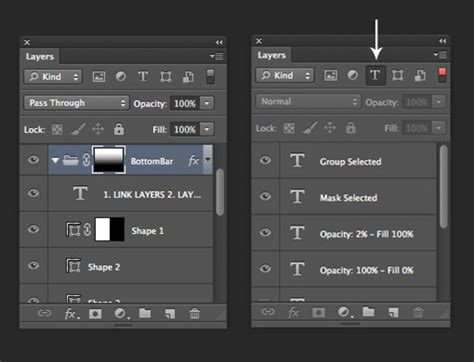
When you create new shapes in Photoshop or add text to a project, they automatically show up as a vector layer. However, to paint directly onto a vector layer, you need to rasterize it. Instead, you can add a new layer as an overlay on your vector layer and paint or draw on that. You can rasterize to change the color of shapes or text with the Paint Bucket tool, or you can change shape color by selecting your shape layer in the Layers panel and going to Window > Properties and changing the color with the Color Picker. To use the Eraser tool to remove parts of your vector shape, you need to rasterize it. Instead, you can select your layer and click the Layer Mask icon (a rectangle with a circle in the center) at the bottom of the Layers panel, and then select the Brush tool to paint on your layer mask.
How to Rasterize an Image in Photoshop
Mastering Photoshop can be a challenge regardless of your skill level, but rasterizing images is something that every designer, photographer, or digital artist should know. Being able to convert images, text, shapes, or smart objects into pixels expands the creative possibilities of what you’re able to create.
Step-by-Step Rasterization
Open your image: Inside Photoshop, navigate to the top menu. Click on File > Open and select the image you want to rasterize, then click Open.
Rasterize your vector layer: Once your image has loaded, go back to the top menu. Select Layer > Rasterize, then choose the best option based on your requirements from the list. "Layer" or "All Layers" should work to rasterize an image.
Confirm your choice: Based on your version of Photoshop, you may or may not get a prompt to confirm your choice. If you do, select “OK” to finish the process of rasterizing your image.
What is Rasterize in Photoshop? Difference Between Raster, Vector, and Smart Objects
Rasterizing Different Content Types
When you select Layer > Rasterize from the top menu, you’ll see different options for what you can rasterize from your current file. Instead of rasterizing all of your layers or a specific layer, you can choose to raster specific elements like type, shapes, smart objects, and more.
The options you'll typically find under the Layer > Rasterize menu include:
- Type: Converts a text layer into pixels.
- Shape: Converts a vector shape layer into pixels.
- Fill Content: Rasterizes the content of a shape layer, allowing for pixel-based editing of the fill.
- Vector Mask: Rasterizes the vector mask of a layer, converting it into a pixel-based mask.
- Smart Object: Converts a Smart Object into a regular pixel layer.
- Video: Rasterizes a video layer (available in extended versions).
- 3D: Rasterizes a 3D layer (available in extended versions).
- Layer: Rasterizes the currently selected layer.
- All Layers: Rasterizes all layers in the document.
Rasterizing Shapes
For shape layers, rasterizing enables us to convert the vector-based shapes into pixel-based images, which allows for greater flexibility when editing them.
Rasterizing Text
To rasterize text in Photoshop, first, create a text layer and select it in the Layers panel. Then, navigate to Layer > Rasterize > Type.
Rasterizing Smart Objects
Smart objects are a powerful feature in Photoshop that preserves an image's original characteristics and allows for non-destructive editing. However, there may be instances where rasterizing smart objects is necessary to perform further edits on the layer. When you rasterize a smart object, it loses its smart object capabilities and becomes a standard pixel layer.
Rasterizing Layer Masks
When working with layer masks, rasterizing can be beneficial in certain situations, such as when we want to edit previously masked areas directly on the image.
Considerations and Drawbacks of Rasterization
Once we rasterize a vector layer, we can no longer edit its properties as a vector image. This means you’ll also lose the ability to scale your shape to any size without some loss in image quality. While many graphic designers avoid rasterizing unless absolutely necessary, rasterizing a vector layer doesn’t have to compromise the quality of your project.
Image Quality and Resolution
One of the main effects of rasterization on image quality is the appearance of jagged edges along lines and shapes, particularly when dealing with non-standard colors or intricate designs. In addition, rasterized images may experience loss of quality when they are resized or transformed. Pixels can become distorted when stretching or compressing our image, leading to a blurry or jagged appearance.
The higher the resolution (or pixel density) of our rasterized image, the less visible the pixelation will be. Therefore, when rasterizing, it's important to consider the intended output size and resolution to maintain the best possible quality.
Preserving Original Layers
Before rasterizing, it's often a good practice to duplicate the layer. Because rasterization cannot be reversed, choosing Layer > Duplicate to save a copy of your selected layer just in case you need the original vector object later is a wise precaution.
Conclusion
In summary, rasterize and vector layers serve different purposes in Photoshop. Vector layers offer crisp, clean lines when creating designs like logos, while raster images provide a versatile platform for editing complex images. Rasterizing in Photoshop alters the image quality by converting vector layers into pixels. This can lead to jagged edges, resolution limitations, and loss of quality during transformations. Experimenting with rasterizing layers can help us explore creative options in our designs.
Learn even more tips and tricks with our other Photoshop tutorials. If you’re looking for high-quality vector graphics for your projects, you can find over 100,000 high-quality options in the Storyblocks image library. With a Storyblocks subscription, you can unlock unlimited downloads of over 6 million royalty-free stock video, audio, and image files for one flat fee with comprehensive licensing. Explore our plans to find the one that meets your creative needs today.
tags: #what #is #rasterization #in #photoshop