Adobe Illustrator's Artboard tool is a fundamental element for any designer working with multi-page documents or complex layouts. Artboards act as the individual canvases or workspaces within your Illustrator file, defining the boundaries of each distinct design element. Think of them as individual sheets of paper where your creative work takes place, allowing for organized and efficient management of your projects, whether they are for print campaigns, responsive web designs, or a series of social media posts. Understanding and effectively utilizing artboards is an essential skill for anyone aiming to work with Adobe Illustrator proficiently.

Understanding the Core Concept: What are Artboards?
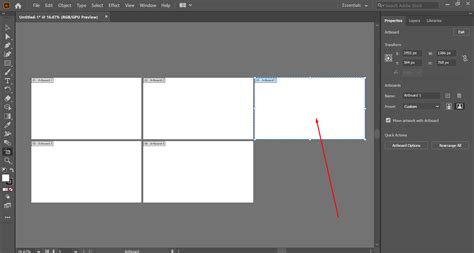
At their core, artboards in Adobe Illustrator are the designated areas where your design work is done and displayed. They can be visualized as a white rectangle situated on a larger gray canvas, known as the pasteboard. While you can technically work anywhere within the Illustrator canvas, to ensure your designs are published to a specific dimension and kept in place, they must ultimately reside on an artboard. For purposes of printing or exporting, a single artboard functions analogously to a page, and a collection of artboards represents a multi-page document.
Artboards are not structural containers like layers or groups; they are not represented in the Layers panel. Instead, they offer an independent method for functionally grouping objects. This independent representation is clearly visible in their own dedicated Artboard panel. Thus, for working with artboards, the Artboards panel serves as an alternative to, and is analogous to, the Layers panel. You can create up to an impressive 1000 artboards within a single document, providing immense flexibility for extensive projects.
Creating New Artboards: Laying the Foundation
There are several straightforward methods to introduce new artboards into your Illustrator document, catering to different workflow preferences.
Method 1: Utilizing the Artboard Tool
The most direct approach involves using the dedicated Artboard Tool.
- Select the Artboard Tool: Locate the Artboard Tool in the Tools Panel. The keyboard shortcut for this indispensable tool is Shift + O.
- Click and Drag: Once selected, simply click and drag on your document canvas to create a new artboard. The size of the artboard is determined by the area you drag.
- Precise Dimensions: To create an artboard with specific dimensions before drawing, hold down the Shift key while dragging. This constrains the proportions.
- Duplicating Artboards: To efficiently create multiple artboards with identical dimensions, press and hold the Alt key (on Windows) or the Option key (on Mac) while dragging. This action duplicates the selected artboard.
Method 2: Employing the Artboards Panel
The Artboards Panel offers a more structured way to manage and create your artboards.
- Open the Artboards Panel: Navigate to Window > Artboards in the top menu bar.
- New Artboard Button: At the bottom of the Artboards Panel, you'll find a circular button with a plus sign. Clicking this button will create a new artboard, typically with the same dimensions as the currently active one.
- Artboard Presets: Adjacent to the New Artboard button, there's a dropdown menu. This allows you to select from a variety of pre-defined artboard presets, which are useful for quickly setting up artboards for common devices or print sizes.
Creating artboards in Illustrator is as simple as opening a new document. If you're already working on a project and need to add another artboard, you can do so at any time. Learning how to add or create an artboard will be particularly convenient if you're working on projects such as a magazine, a portfolio, or even a series of social media posts.
Resizing and Positioning Artboards: Fine-Tuning Your Workspace
Once your artboards are in place, you'll often need to adjust their size and position to perfectly accommodate your designs.
Resizing Artboards
- Select the Artboard: Click on the border of the artboard you wish to modify. This enters Artboard Editing Mode.
- Drag Handles: Click and drag any of the corner points or handles that appear around the selected artboard to resize it.
- Maintain Aspect Ratio: To ensure the proportions of your artboard remain consistent during resizing, hold down the Shift key while dragging.
- Precise Numerical Input: For exact dimensions, you can utilize the Transform Panel (Window > Transform). Here, you can numerically input precise Height and Width values.
Positioning Artboards
- Direct Manipulation: With the Artboard Tool selected, you can simply click and drag an artboard to reposition it on the pasteboard.
- Using the Transform Panel: The Transform Panel also allows for precise control over the X and Y coordinates of your artboard, enabling exact placement relative to the canvas or other elements.
- Smart Guides: Illustrator's Smart Guides are incredibly useful for aligning your artboards accurately. They appear automatically, assisting in the precise positioning of objects and artboards by snapping to edges and centers.
Organizing and Managing Artboards: Streamlining Your Workflow
Effective organization of multiple artboards is crucial for maintaining clarity and efficiency in your design process.
Reordering and Grouping
The Artboards Panel (Window > Artboards) is your central hub for managing artboards. Here, you can:
- Reorder Artboards: Use the up and down arrow buttons at the bottom of the panel to change the print order of your artboards. This is particularly important for multi-page documents.
- Rename Artboards: Double-click on an artboard's name in the panel to rename it. Descriptive names make it easier to identify and manage individual artboards, especially when exporting.
- Group Artboards: While not a direct grouping function like layers, you can visually arrange artboards on the canvas to represent logical groupings.
Locking Artboards
To prevent accidental movement or resizing of an artboard, you can effectively "lock" it. While there isn't a direct lock feature for artboards themselves in the same way as objects, by carefully managing your selections and using the "Move artwork with artboard" option (discussed below), you can achieve a similar outcome.
Using Presets and Automation
Illustrator offers features to automate artboard creation and management:
- Artboard Options Dialog: Access this via Object > Artboards > Artboard Options. Here, you can set default artboard settings, rename artboards, and choose from a wide array of presets.
- Rearrange All Artboards: This powerful feature (Object > Artboards > Rearrange All Artboards) allows you to automatically arrange all your artboards into a grid or a specific layout. You can define the number of columns or rows, and Illustrator will intelligently position them on the pasteboard.
Advanced Artboard Techniques: Beyond the Basics
As you become more comfortable with artboards, you'll discover advanced techniques that further enhance your workflow.
Duplicating Artboards with Content
To duplicate an artboard along with all its contents, the most efficient method is:
- Select the Artboard Tool (Shift + O).
- Select the Artboard: Click on the artboard you wish to duplicate.
- Hold Alt/Option and Drag: Press and hold the Alt (Windows) or Option (Mac) key, then click and drag the selected artboard to an empty space on the pasteboard. This creates a duplicate artboard with all its associated artwork.
Alternatively, you can select the artboard, then press and hold Alt + Drag. Ensure that the "Move artwork with artboard" option is enabled in the Properties panel or the Control panel to carry over the content.
Moving Artwork with Artboards
A critical aspect of working with artboards is ensuring that your artwork stays with its intended artboard when you move or duplicate them.
- Properties Panel: When the Artboard Tool is active and an artboard is selected, look for the "Move artwork with Artboard" checkbox in the Properties panel. Ensure this is checked.
- Control Panel: In the Control panel (usually located at the top of the screen), you'll find a similar icon, often depicted as a box with an arrow, that toggles the "Move/Copy artwork with Artboard" functionality.
Fitting Artboards to Content
If you have artwork that dictates the required size of your artboard, Illustrator can automatically adjust the artboard to fit.
- Select the Artboard Tool (Shift + O).
- Double-Click the Artboard Tool: This opens the Artboard Options dialog.
- Choose "Fit to Selected Art": Within the "Presets" dropdown menu, you'll find options like "Fit to Artboard Bounds" and "Fit to Selected Art." Selecting "Fit to Selected Art" will resize the artboard to precisely encompass all the artwork associated with it.
Rotating Artboards (View Rotation)
It's important to note that you cannot directly rotate an artboard itself in the same way you rotate an object. However, you can rotate your view of the artboard.
- Select the Artboard Tool (Shift + O).
- Hold Shift + Spacebar: While holding these keys, your cursor will change to a hand icon with a curved arrow.
- Drag to Rotate View: Click and drag your cursor to rotate the view of your artboard. This rotation is purely visual and does not affect the underlying artwork or the artboard's orientation for export.
For a more precise rotation of the view, you can use the Rotate View tool found in the Tools Panel or manually enter an angle in the "Rotate View" field at the bottom of the Illustrator window.
Exporting and Saving Artboards: Delivering Your Work
The way you save or export your Illustrator file depends on your intended output. Artboards play a crucial role in this process.
Exporting Individual Artboards
When exporting your design, you have granular control over which artboards are included and in what format.
- File > Export > Export As…
- Choose File Type: Select your desired format (e.g., PNG, JPG, SVG, PDF).
- Select "Use Artboards": In the export dialog box, ensure the "Use Artboards" option is checked.
- Specify Range: You can choose to export "All" artboards or specify a "Range" by entering the artboard numbers.
- Format Settings: Depending on the file type, you'll have options for background color (including transparency for PNGs), compression, and more.
For transparent backgrounds, specifically when exporting to PNG, select PNG in the format settings and choose "Transparent" under the "Background Color" options.
Saving as PDF with Artboards
When saving as a PDF:
- File > Save As…
- Choose Adobe PDF as the format.
- Save PDF Options: In the subsequent dialog, you can control various PDF settings. The "Range" option allows you to select specific artboards to include in the PDF. You can also choose to "Hide Artboards" if you prefer not to show the artboard boundaries in the final PDF.
Saving Each Artboard as a Separate File
If you need each artboard to be a distinct file:
- File > Export > Export As…
- Choose File Type and ensure "Use Artboards" is selected.
- Range Option: Select the "Range" radio button.
- Save Each Artboard: In the export dialog, look for an option like "Save each artboard to a separate file." This will generate individual files for each artboard. You can specify the artboard numbers in the "Range" field if you only want to export a subset.
When saving as SVG or EPS, the "Use Artboards" option is also available, ensuring that your exported files are cropped to the dimensions of each artboard.
Deleting Artboards: Cleaning Up Your Workspace
Occasionally, you may need to remove artboards that are no longer necessary.
- Minimum One Artboard: Remember that Illustrator requires at least one artboard to be present in a document.
- Select Artboard Tool (Shift + O).
- Delete Individual Artboards: Click on the artboard you wish to delete. A small 'X' icon will appear in its upper-right corner. Click this 'X' to remove it.
- Delete Multiple Artboards: Hold down the Shift key and click on multiple artboards to select them, then click the 'X' icon for any of the selected artboards to delete them all.
- Artboards Panel: You can also select an artboard's row in the Artboards Panel and press the delete key or click the trash can icon at the bottom of the panel (if available). There's also an option within the panel's burger menu to delete all artboards that contain no artwork.
How to use Artboards in ILLUSTRATOR | Easy Art Board Adobe Tutorial
By mastering the Artboard tool and its associated features, designers can significantly enhance their efficiency and organization within Adobe Illustrator, leading to more streamlined and professional design workflows. Practice using these techniques to become more comfortable and proficient with this essential Illustrator functionality.