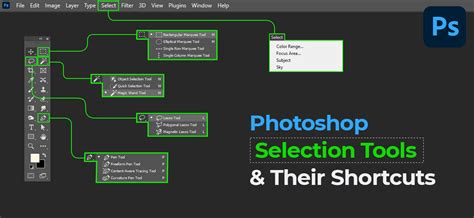
Photoshop, the undisputed leader in image editing software, offers a vast array of tools that empower users to manipulate digital imagery with unparalleled precision. Among the most fundamental and crucial of these capabilities is the art of making selections. Without the ability to isolate specific areas of an image, making targeted adjustments, enhancements, or even removals would be impossible. Photoshop provides a diverse toolkit, with each selection tool meticulously designed for a particular task, ensuring that whether you're a beginner or a seasoned professional, you can achieve the desired results.
The core principle behind Photoshop's selection tools is to define a specific area within an image that will be subject to editing, while leaving the rest of the image untouched. This selective editing is the cornerstone of non-destructive workflows and allows for intricate manipulation. As Dave Grohl might attest, the ability to precisely select elements is paramount. Photoshop allows you to select areas of your image based on two primary criteria: colour and shape. Understanding these criteria and the tools designed to exploit them is the first step to unlocking Photoshop's full potential.
Geometric Selections: The Marquee Tools
For areas of an image that possess basic geometric shapes, Photoshop offers a suite of intuitive tools known as the Marquee Tools. These are your go-to for selecting perfect squares, rectangles, circles, and ellipses.
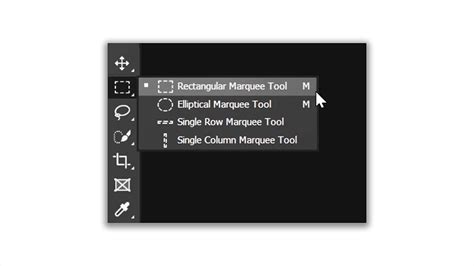
The Rectangular Marquee Tool
The Rectangular Marquee Tool (shortcut M) is arguably the most straightforward selection tool. It's ideal for selecting areas with sharp, straight edges that form a rectangle or square. To use it, simply click on one corner of the desired area and drag your cursor to the opposite corner. This action will create a bounding box, defining your selection.
If you need to add to an existing selection made with the Rectangular Marquee Tool, you can do so by clicking the "Add to selection" icon in the options bar or by holding down the Shift key while dragging a new selection. This allows you to build up complex selections from simpler rectangular components.
The Elliptical Marquee Tool
Mirroring the functionality of its rectangular counterpart, the Elliptical Marquee Tool operates on ellipses and circles. While it might seem like a simple variation, it's indispensable for selecting rounded elements. The process is similar: click and drag from one point to define the boundaries of your ellipse.
A common challenge with the Elliptical Marquee Tool is accurately positioning the ellipse. To overcome this, a handy trick is to hold down the Spacebar while dragging. This allows you to freely move the ellipse around your canvas without altering its shape or size. For those aiming for a perfect circle, simply hold down the Shift key while dragging. This constraint ensures that the ellipse maintains equal width and height, resulting in a flawless circle.
A useful tip for both Marquee tools is the ability to create a selection from a central point. By holding down the Option/Alt key, you can draw a rectangular or elliptical selection outwards from the cursor's position, which can be incredibly helpful for precise centering.
(Pro Tip: Press Shift+M to toggle between the various marquee tools, efficiently switching between rectangular and elliptical options.)
Freeform and Precise Shape Selections: The Lasso Tools
When dealing with non-geometric shapes or organic forms, the Marquee Tools fall short. This is where the Lasso Tools come into play, offering more flexibility for freehand and guided selections.
The Lasso Tool
The Lasso Tool (shortcut L) functions much like a pencil. You simply draw a freehand outline around the area you wish to select. This tool is excellent for capturing irregular shapes and organic contours, allowing for a highly personalized selection. However, achieving a perfectly smooth or precise selection with the standard Lasso Tool can be challenging, often requiring a steady hand.

The Polygonal Lasso Tool
For selections that are composed primarily of straight lines but aren't necessarily basic geometric shapes, the Polygonal Lasso Tool is a lifesaver. Its operation is straightforward: you click on the image to create anchor points, and each click generates a straight line segment connecting the previous point to the new one. This process allows you to build a selection with a series of connected straight lines, forming a polygon around your object. It offers significantly more control and precision than the freehand Lasso Tool for angular shapes. If you accidentally create an unwanted vertex, you can press the Delete key to remove the last point created.
The Magnetic Lasso Tool
The Magnetic Lasso Tool is a more advanced and often more efficient option within the Lasso family. It's designed to automatically detect the edges of objects with good contrast against their background. As you move your mouse cursor along the edge of the object you wish to select, the Magnetic Lasso Tool attempts to snap to the edge, creating a series of anchor points. This "magnetic" behavior significantly reduces the effort required to create clean selections around clearly defined subjects. It follows the movement of your mouse, creating a selection around a clearly defined object by intelligently analyzing the colour and tonal differences between adjacent pixels.
To toggle between the different Lasso tools, you can use the shortcut Shift+L.
Colour-Based Selections: Magic Wand and Color Range
While shape-based tools are effective for distinct forms, sometimes selecting based on colour is more efficient, especially when dealing with areas of uniform or similar hues.
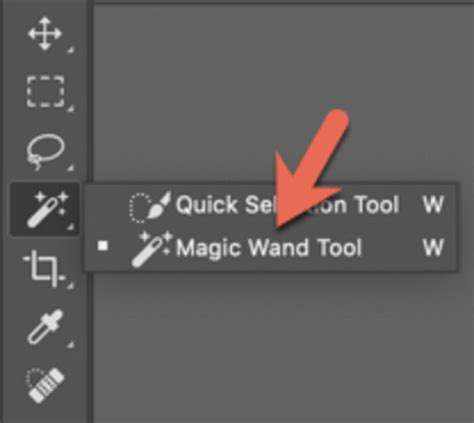
The Magic Wand Tool
Arguably the king of colour-based selections, the Magic Wand Tool (shortcut W) is a powerful asset. It works by clicking on a pixel, and then it selects all adjacent pixels of similar colour and tone within a defined tolerance. The selection is often better articulated and quicker to create than if one had attempted it manually with a shape-based tool, particularly for areas of solid colour.
The Magic Wand Tool is excellent for selecting large areas of a single colour, such as a clear sky or a solid background. By adjusting the "Tolerance" setting in the options bar, you can control how similar the colours need to be to be included in the selection. A lower tolerance will select colours very close to the sampled pixel, while a higher tolerance will include a broader range of colours.
If you want to give an object or logo a transparent background, the Magic Wand is often your first port of call. Simply click on the background colour, and if it's uniform, the Magic Wand will select it. You can then press Delete to remove it.
The Color Range Command
For a more controlled and nuanced colour-based selection, the Color Range function, found in the Select menu, is invaluable. This command allows you to select colours based on a sample or by choosing from predefined colour ranges. You can fine-tune your selection by adjusting the "Fuzziness" slider, which works similarly to the Magic Wand's Tolerance. This method offers a more sophisticated way to target specific colour ranges within an image.
Hybrid and Intelligent Selections: Quick Selection and Quick Mask
Bridging the gap between shape and colour-based selection, and offering advanced control, are the Quick Selection Tool and Quick Mask Mode.
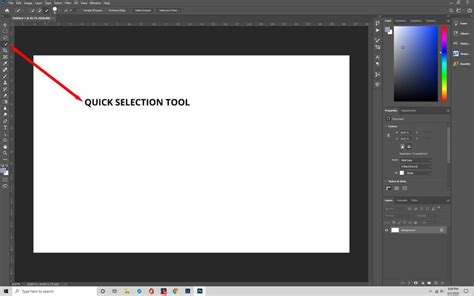
The Quick Selection Tool
The Quick Selection Tool (also shortcut W, often grouped with the Magic Wand) is a hybrid tool that combines aspects of both shape and colour-based selection. It works intuitively like a brush; as you paint over an area, Photoshop analyzes the colour and tonal similarities and detects edges to build a selection. This tool is incredibly smart. If you make a mistake and paint over an unintended section, the Quick Selection Tool often learns from this input. You can then choose to subtract from the selection, and it will adjust its understanding to avoid that area in future strokes.
To subtract from a selection made with the Quick Selection Tool, you can select the "Subtract from selection" option in the top bar. This allows for iterative refinement of your selection. Don't stress about making a perfectly precise selection the first time around. Instead, create a general selection and use Shift to add the smaller chunks you missed. Likewise, use Option/Alt to subtract areas that were inadvertently included.
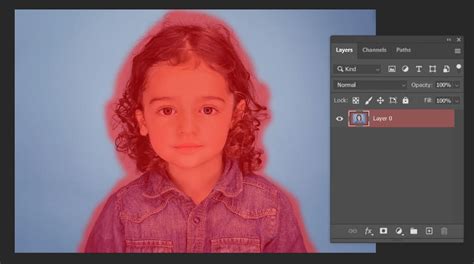
Quick Mask Mode
Quick Mask Mode (shortcut Q) offers a different, yet powerful, approach to selections. When activated, the areas not selected are shown as a translucent overlay (typically red). You can then use painting tools, such as the Brush Tool, within Quick Mask Mode to refine your selection. Painting with white adds to the selection (removes the overlay), while painting with black removes from the selection (adds the overlay).
This mode is particularly useful when you need to make very precise adjustments or when dealing with soft edges, like hair or fur. You can draw using the brush with either a white or black fill on the canvas. Once you've finished painting, hitting Q again will convert your painted mask back into a standard selection. You can also choose a different overlay colour in the Quick Mask Options for better visibility against your image. Painting with black and white to clean up the mask becomes much easier in this mode.
The Selection Brush tool, which functions similarly to Quick Mask, is another option for painting selections. It offers the advantage of being able to adjust brush hardness and flow, allowing for very soft, feathered edges.
Combining Tools and Refining Selections
Often, a single selection tool in isolation won't achieve the desired result. The true power of Photoshop's selection capabilities lies in combining different tools and employing refinement techniques.
The Power of Combination
A common and effective workflow involves creating a rough initial selection with tools like the Magic Wand or Quick Selection Tool, and then fine-tuning it using either Quick Mask Mode or the Lasso tools. For instance, you might use the Magic Wand to quickly select a large area of sky and then switch to the Lasso Tool to meticulously select clouds or other intricate details within that area.
Advanced Refinement Techniques
Once an initial selection is made, Photoshop offers several ways to refine its boundaries.
- Feathering: This technique softens the edges of your selection, creating a gradual transition between the selected area and the rest of the image. This is crucial for making adjustments that blend seamlessly. Feathering can be applied before or after a selection is made, and it's a setting found in various selection tool options or within the "Select and Mask" workspace.
- Anti-aliasing: This is a small yet important feature that modifies the edge pixels of the image while you're selecting, making it clearer to Photoshop where edges start and end. It doesn't alter the image details but results in cleaner, smoother selections. Anti-aliasing is a setting available on tools like the Magic Wand, Elliptical Marquee, and all tools in the Lasso family.
- Select and Mask Workspace: For highly complex selections, especially those involving fine details like hair or fur, Photoshop's "Select and Mask" workspace is indispensable. This dedicated environment provides a suite of advanced tools for refining selections, including edge detection, smoothing, feathering, contrast adjustment, and shifting edge selection.
Advanced selections & masking in Adobe Photoshop - Select Anything! - Adobe Photoshop CC
Additional Selection Enhancements and Shortcuts
Photoshop is replete with shortcuts and features designed to streamline the selection process.
- Inverting a Selection: Sometimes it's easier to select what you don't want and then invert the selection. The shortcut for this is Shift+F7. This is particularly helpful when the object you want to select takes up most of the picture but is difficult to isolate directly.
- Cycling Through Tools: Holding down Shift and then pressing the shortcut for a tool group (e.g., Shift+M for Marquee tools, Shift+L for Lasso tools, Shift+W for Magic Wand/Quick Selection) will cycle through the various tools within that group.
- View Options: When making precise selections, it's beneficial to have a clear view of your work. In the View menu on the right side of the workspace, you can choose various view options, such as "Overlay," to see your selection more accurately.
- Copying and Pasting Selections: If your goal is to isolate a selected area from its layer, you can copy the selection (Command/Control+C) and then paste it (Command/Control+V). This creates a new layer containing only the selected content.
The Pen Tool: Surgical Precision
While not strictly a "selection" tool in the same vein as the others, the Pen Tool deserves special mention for its ability to create extremely precise, vector-based paths that can then be converted into selections. If you need surgically precise selections around almost anything, spending time with Photoshop's Pen Tool is a worthwhile investment. It allows you to create anchor points and Bézier curves, offering unparalleled control over the shape of your selection. Once a path is created, you can right-click and choose "Make Selection" to convert it into a pixel-based selection.
Conclusion: The Foundation of Image Editing
Mastering Photoshop's selection tools is not merely about learning a few tricks; it's about acquiring a fundamental skill that underpins almost every aspect of image editing. Whether you're performing basic adjustments, creating intricate composites, or isolating subjects for retouching, the quality of your selections directly impacts the final outcome. The diverse range of tools available, from the simple Marquee tools to the sophisticated Pen Tool and the intelligent Quick Selection tool, ensures that there's a method suited for every task. By understanding the strengths of each tool and learning to combine them effectively, you unlock greater control and can achieve professional-level results in your Photoshop workflow.