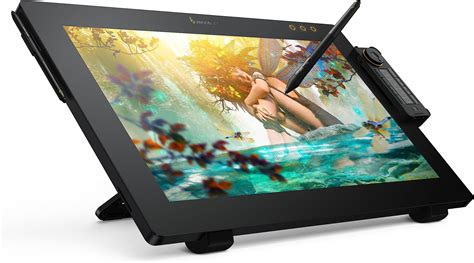
The XP-Pen screen protector is an essential accessory for any digital artist or creative professional who relies on their XP-Pen display tablet for their work. It safeguards the sensitive drawing surface from scratches, smudges, and accidental damage, ensuring a pristine and responsive experience. However, the installation process, while seemingly straightforward, can be a source of frustration if not approached with care and attention to detail. This guide aims to demystify the application of an XP-Pen screen protector, breaking down each step to help you achieve a bubble-free, perfectly aligned, and professional-looking finish.
Understanding the Importance of a Screen Protector
Digital art relies on a direct connection between the artist's hand and the digital canvas. The surface of your XP-Pen tablet is designed to mimic the feel of paper, providing tactile feedback and precise stylus tracking. However, this surface is also susceptible to wear and tear. Over time, repeated stylus strokes, accidental bumps, or even cleaning can lead to micro-scratches that can degrade the drawing experience, create unwanted visual artifacts, and potentially affect stylus accuracy.
A high-quality screen protector acts as a sacrificial layer, absorbing the brunt of daily use and protecting the original display. Beyond physical protection, many screen protectors also offer benefits like reduced glare, improved surface texture for a more paper-like feel, and enhanced fingerprint resistance. For professionals, maintaining the integrity of their drawing surface is paramount to ensuring consistent quality and longevity of their tools. The user's provided text, while focused on website cookies, highlights the importance of site functionality and user experience, which can be metaphorically extended to the user experience of a digital artist. A well-installed screen protector directly contributes to a positive and uninterrupted user experience on an XP-Pen tablet.
Preparing Your Workspace and Tablet for Installation
The most common pitfalls during screen protector installation - bubbles and dust - can be largely avoided with thorough preparation. Before you even unpeel the protector, dedicate time to creating an optimal environment and cleaning your tablet.
Creating a Dust-Free Zone:Dust is the arch-nemesis of screen protector installation. Airborne particles are tenacious and can easily settle on the screen or the adhesive side of the protector during application, leading to unsightly bubbles or specks trapped beneath the surface. To minimize this, choose a well-lit but relatively still area. Avoid installing near open windows, fans, or in rooms where activities like dusting or vacuuming have recently occurred. A bathroom, after running a hot shower for a few minutes to steam up the room and settle dust particles, can surprisingly be an effective dust-free environment.
Gathering Your Tools:Most XP-Pen screen protectors come with an installation kit, but it's wise to have a few extra items on hand:
- Microfiber cloths: Crucial for cleaning the screen without scratching. Ensure they are clean and lint-free.
- Rubbing alcohol wipes (or a screen cleaning solution): For effectively removing oils and grime.
- Compressed air can: To blow away any stubborn dust particles from the screen and edges.
- Squeegee or credit card: To help smooth out the protector and push out air bubbles.
- Dust removal stickers (often included): These are sticky tabs specifically designed to lift dust from the screen.
- Good lighting: Essential for seeing small dust particles.
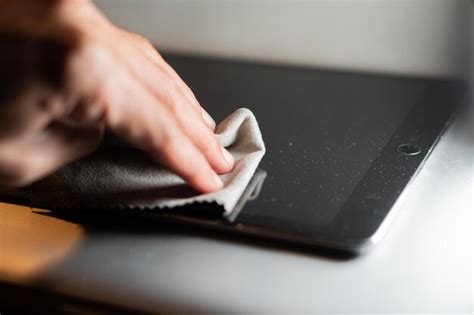
Cleaning Your XP-Pen Tablet:This is arguably the most critical step. A clean screen is paramount.
- Power Down: Turn off your XP-Pen tablet and unplug it. This prevents accidental touches and makes it easier to see dust and smudges on a dark screen.
- Initial Wipe: Use a clean, dry microfiber cloth to gently wipe down the entire screen surface. This removes loose dust and debris.
- Deeper Clean: If your kit includes alcohol wipes or you have a suitable screen cleaner, use it to thoroughly clean the screen. Wipe in one direction (e.g., horizontally) to avoid smearing. Pay attention to the edges and corners where grime can accumulate.
- Final Dust Removal: Once the screen is dry, use the dust removal stickers or a can of compressed air to meticulously remove any remaining microscopic dust particles. Hold the compressed air can upright and use short bursts, keeping it a safe distance from the screen to avoid condensation. Inspect the screen under good lighting from various angles to ensure it is completely free of dust.
The Installation Process: Step-by-Step Application
With your workspace prepped and your tablet sparkling clean, you're ready to apply the screen protector. The key here is patience and precision.
Step 1: Aligning the ProtectorMost XP-Pen screen protectors have a specific orientation. Identify the top, bottom, left, and right sides. Many protectors have numbered tabs or markings to indicate which layer to peel off first. Carefully align the protector with the edges of your tablet screen. It's often easier to align one edge (e.g., the top) precisely and then let the rest of the protector naturally fall into place, or to align the side edges.
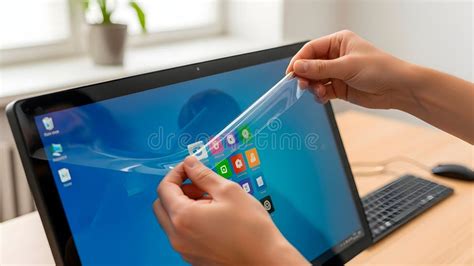
Step 2: Peeling the First Layer and ApplyingOnce aligned, gently peel back the first protective layer (usually marked as "1" or "Front"). It's crucial to peel this back only a small section at a time (an inch or two) as you begin to apply the protector.
- Hinge Method (Recommended): A highly effective technique is to use small pieces of tape to create a "hinge" on one side of the protector. This allows you to lift the protector cleanly, wipe the screen again if any dust has settled, and then carefully lower it back down.
- Gradual Application: As you peel the backing, slowly and steadily press the protector onto the screen, starting from the aligned edge. Use the squeegee or a credit card wrapped in a microfiber cloth to gently smooth out the protector, working from the center outwards. This action helps to push out any trapped air bubbles as you go.
Step 3: Dealing with Air BubblesIt's rare to achieve a perfectly bubble-free application on the first try, especially for beginners. Don't panic! Most small bubbles can be resolved.
- Small Bubbles: For tiny bubbles, try gently pushing them towards the nearest edge of the screen using the squeegee. Sometimes, a slight lift of the protector at the edge where the bubble is located, followed by a re-application with the squeegee, can dislodge it.
- Larger Bubbles: If you encounter a larger bubble, you may need to carefully lift the protector back to the point of the bubble. Use a dust removal sticker to gently lift the bubble and remove any trapped dust. Then, re-apply the protector, smoothing it out with the squeegee. Work slowly and methodically.
- Edge Bubbles: Bubbles trapped right at the edge can sometimes be worked out by applying firm, consistent pressure with the squeegee along that edge.
Step 4: Removing the Second LayerOnce the protector is applied and you've smoothed out as many bubbles as possible, carefully peel off the second protective layer (usually marked as "2" or "Back"). This layer is on the surface of the protector itself. Peel it off slowly and at an angle. As you remove this layer, use the squeegee again to ensure the final surface is smooth and free of any new bubbles or dust.
Step 5: Final Inspection and TouchesAfter the second layer is removed, take a moment to inspect your work under good lighting.
- Stubborn Bubbles: If any persistent bubbles remain, and you've tried the methods above, you might have trapped dust. In this case, you may need to carefully lift the protector back to the bubble, use a dust sticker to remove the dust, and re-apply. Be aware that repeated lifting can affect the adhesive.
- Edge Alignment: Ensure the protector is perfectly aligned with the screen edges. If it's slightly off, and you have a bit of leeway, you might be able to gently nudge it. However, forcing it can cause damage.
Common Mistakes and How to Avoid Them
Even with careful preparation, certain mistakes can derail the installation process. Understanding these pitfalls can help you preemptively avoid them.
- Rushing the Cleaning Process: This is the number one cause of dust and bubbles. Always take your time cleaning the screen. It's better to spend an extra 10 minutes ensuring a dust-free surface than to live with trapped particles.
- Touching the Adhesive: Once the protective backing is peeled, avoid touching the sticky side of the screen protector at all costs. Even the oils from your fingertips can create marks that are difficult to remove and can attract dust.
- Applying Too Much Pressure: While you need to use the squeegee to smooth out bubbles, excessive force can damage the protector or even the tablet screen itself. Apply firm, consistent pressure.
- Incorrect Alignment: Take your time to align the protector perfectly before you start peeling the backing. A slightly misaligned protector can be very distracting and may cover important parts of the screen interface.
- Ignoring the Environment: Installing in a dusty or windy area is a recipe for disaster. Choose your location wisely.
Maintaining Your XP-Pen and Screen Protector
Once your XP-Pen screen protector is successfully installed, proper care will ensure its longevity and maintain your drawing experience.
- Regular Cleaning: Clean the screen protector regularly with a soft, lint-free microfiber cloth. For stubborn smudges or fingerprints, you can slightly dampen the cloth with water or a screen-specific cleaning solution. Avoid harsh chemicals or abrasive materials, which can damage the protector's surface.
- Stylus Care: Ensure your stylus nib is in good condition. A worn-out nib can scratch the screen protector. Replace nibs regularly according to the manufacturer's recommendations.
- Gentle Handling: While the protector adds a layer of defense, avoid dropping your tablet or subjecting it to impacts. The protector is designed to prevent scratches and minor wear, not to withstand significant physical trauma.
Troubleshooting Persistent Issues
If you encounter persistent problems that cannot be resolved with the above methods, consider the following:
- Defective Protector: In rare cases, the screen protector itself might be defective, with manufacturing flaws that lead to issues like uneven adhesion or pre-existing imperfections. If you suspect this, contact XP-Pen customer support or the retailer from whom you purchased the protector.
- Screen Damage: If you notice scratches or damage on your tablet screen before installation, the protector may not adhere correctly, or the existing damage might be exacerbated. In such cases, professional repair or replacement of the tablet screen might be necessary.
How to attach the new protective film on XP-Pen Products
By following these detailed steps and understanding the nuances of screen protector installation, you can ensure a smooth, professional application that protects your valuable XP-Pen display and enhances your digital art workflow for years to come. The investment in time and care during installation will pay dividends in a frustration-free and enjoyable creative experience.